Quick Start
Get Revisium running and create your first project. This guide uses the Admin UI — you can also do everything via REST API, GraphQL, or MCP.
1. Start Revisium
- Cloud
- Standalone (npx)
- Docker Compose
Sign up at cloud.revisium.io using Google or GitHub. No setup required.
npx @revisium/standalone@latest
Open http://localhost:9222. No auth by default — embedded PostgreSQL, zero configuration.
To enable authentication:
npx @revisium/standalone@latest --auth
Login: admin / admin
Create docker-compose.yml:
services:
  db:
    image: postgres:17.4-alpine
    restart: always
    environment:
      POSTGRES_DB: revisium-dev
      POSTGRES_USER: revisium
      POSTGRES_PASSWORD: change-me
  revisium:
    pull_policy: always
    depends_on:
      - db
    image: revisium/revisium:latest
    ports:
      - 8080:8080
    environment:
      DATABASE_URL: postgresql://revisium:change-me@db:5432/revisium-dev?schema=public
docker-compose up -d
Open http://localhost:8080. Login: admin / admin
2. Open the Admin UI
- Cloud: cloud.revisium.io — sign in with Google or GitHub
- Standalone: http://localhost:9222 — no auth by default, with
--auth:admin/admin - Docker: http://localhost:8080 — login:
admin/admin

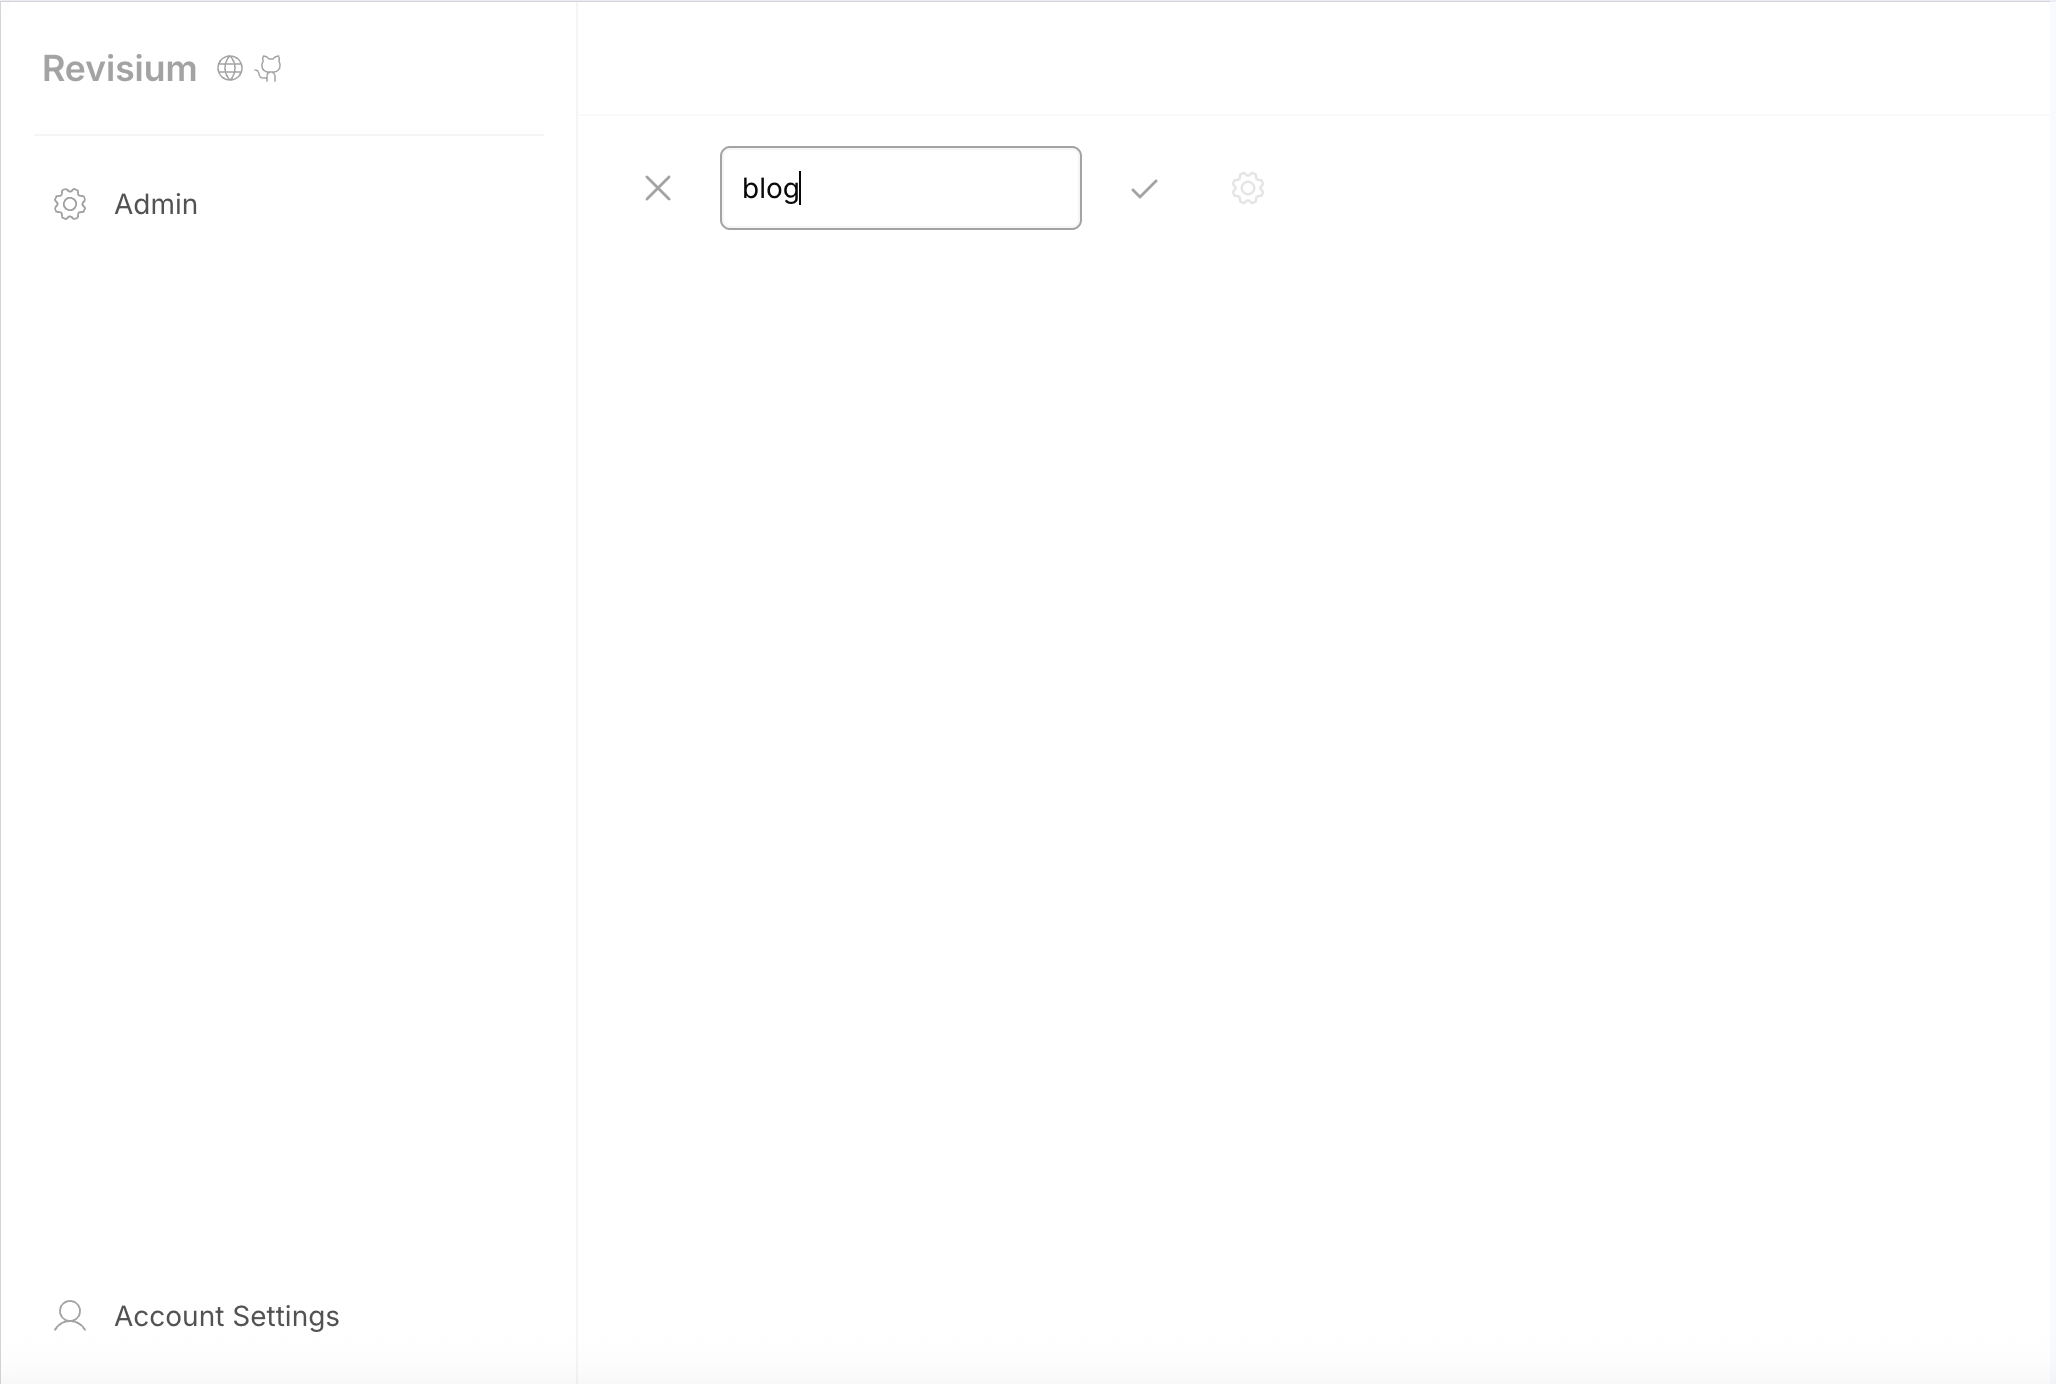
3. Create a Project
- Click New Project
- Enter a name (e.g.,
blog) - You'll land on the default
masterbranch with an empty draft revision
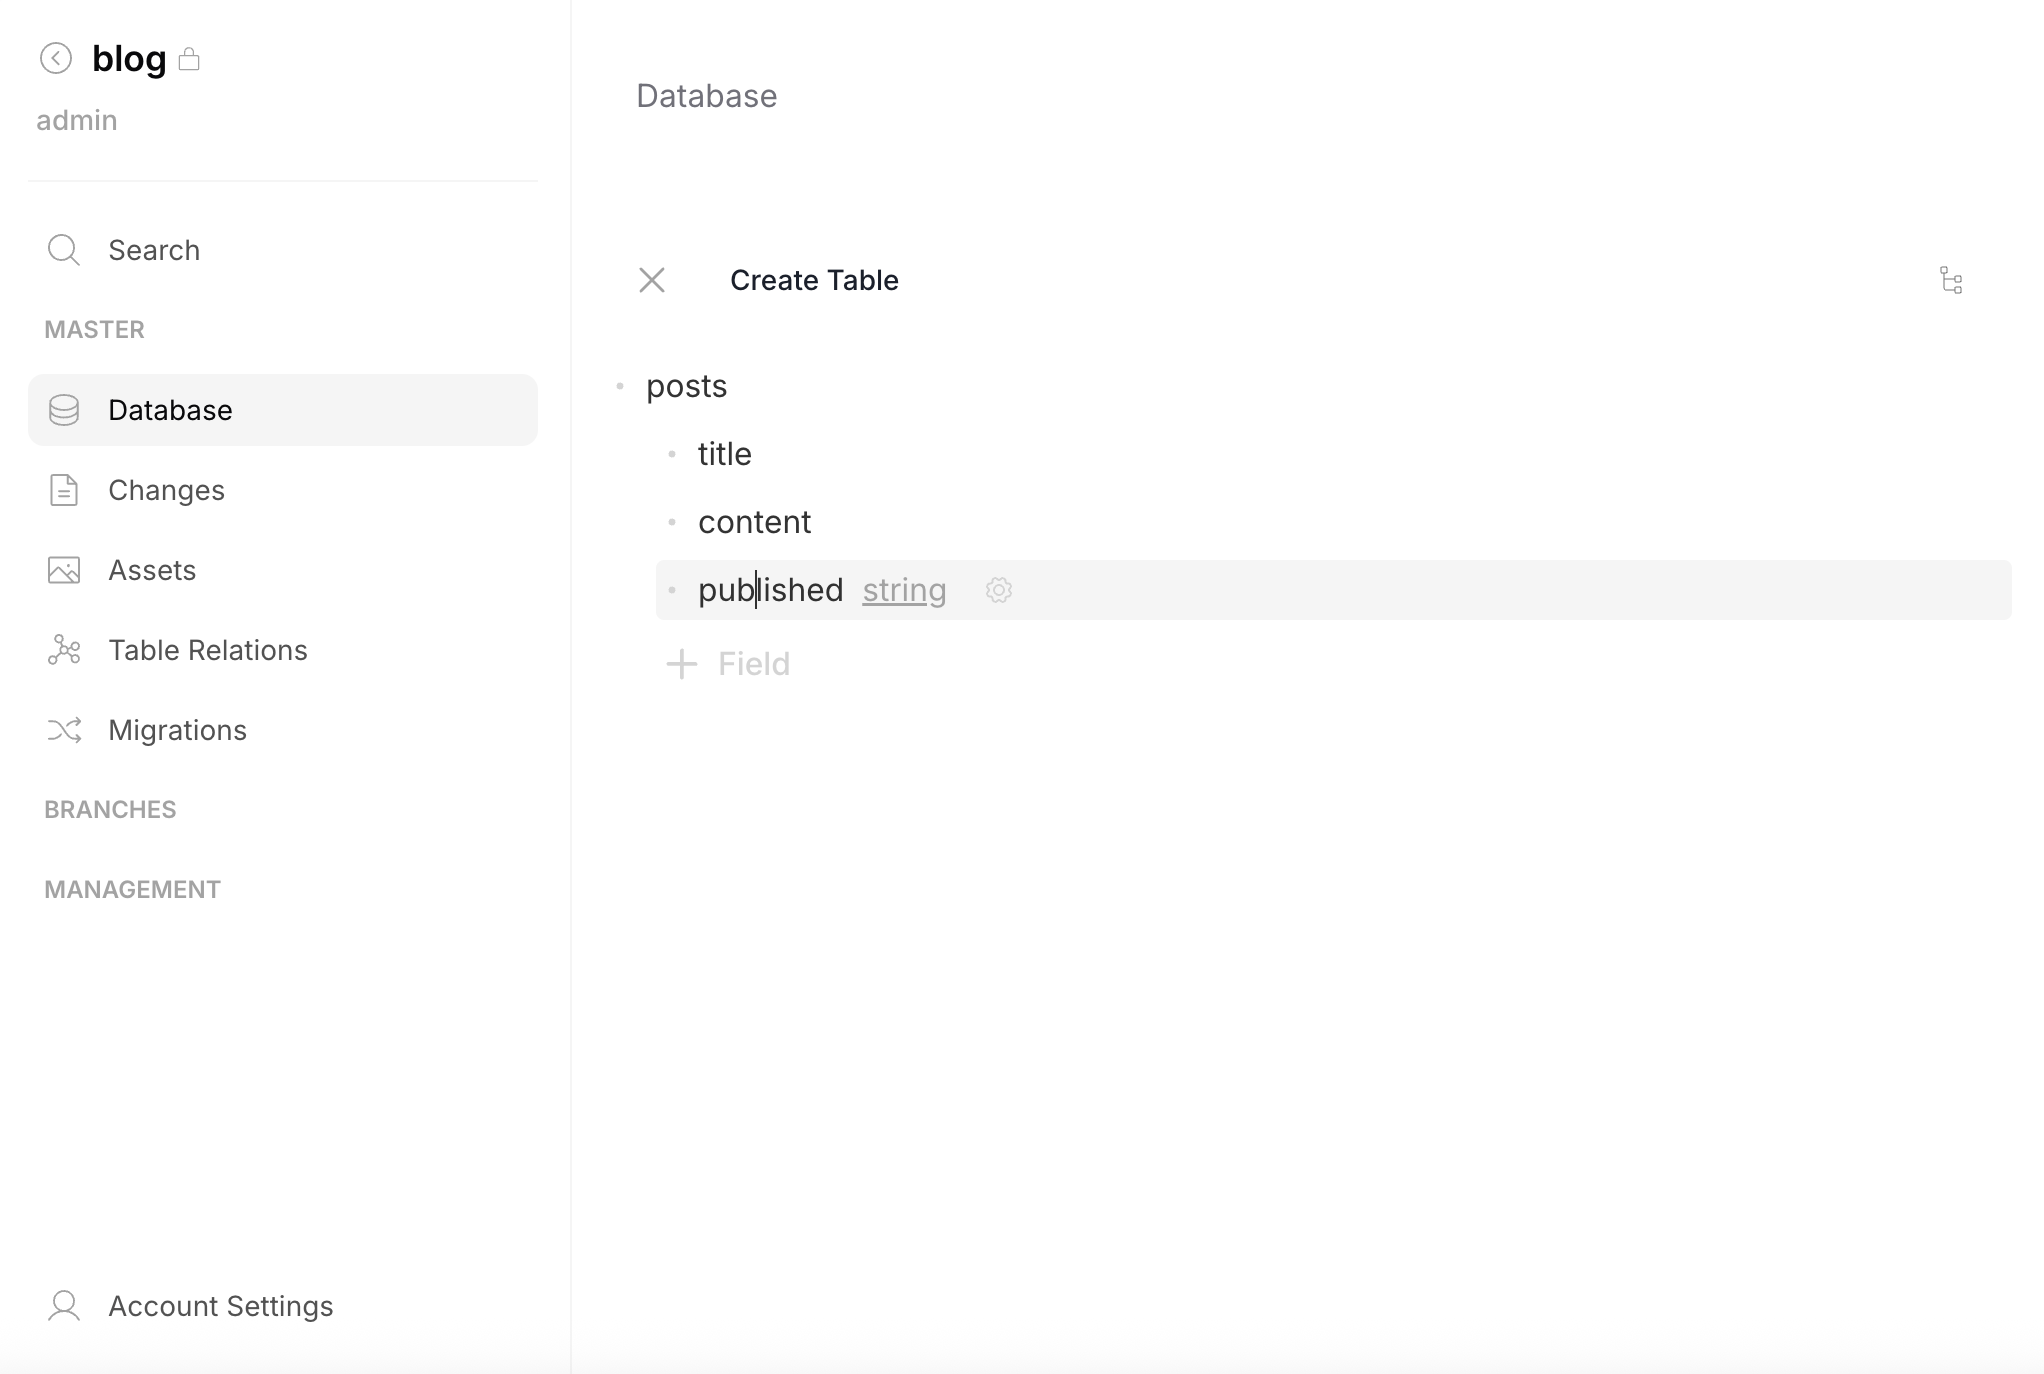
4. Design a Schema
- Click New Table and name it
posts - In the Schema Editor, add fields:
title— Stringcontent— String (format: markdown)published— Boolean (default: false)
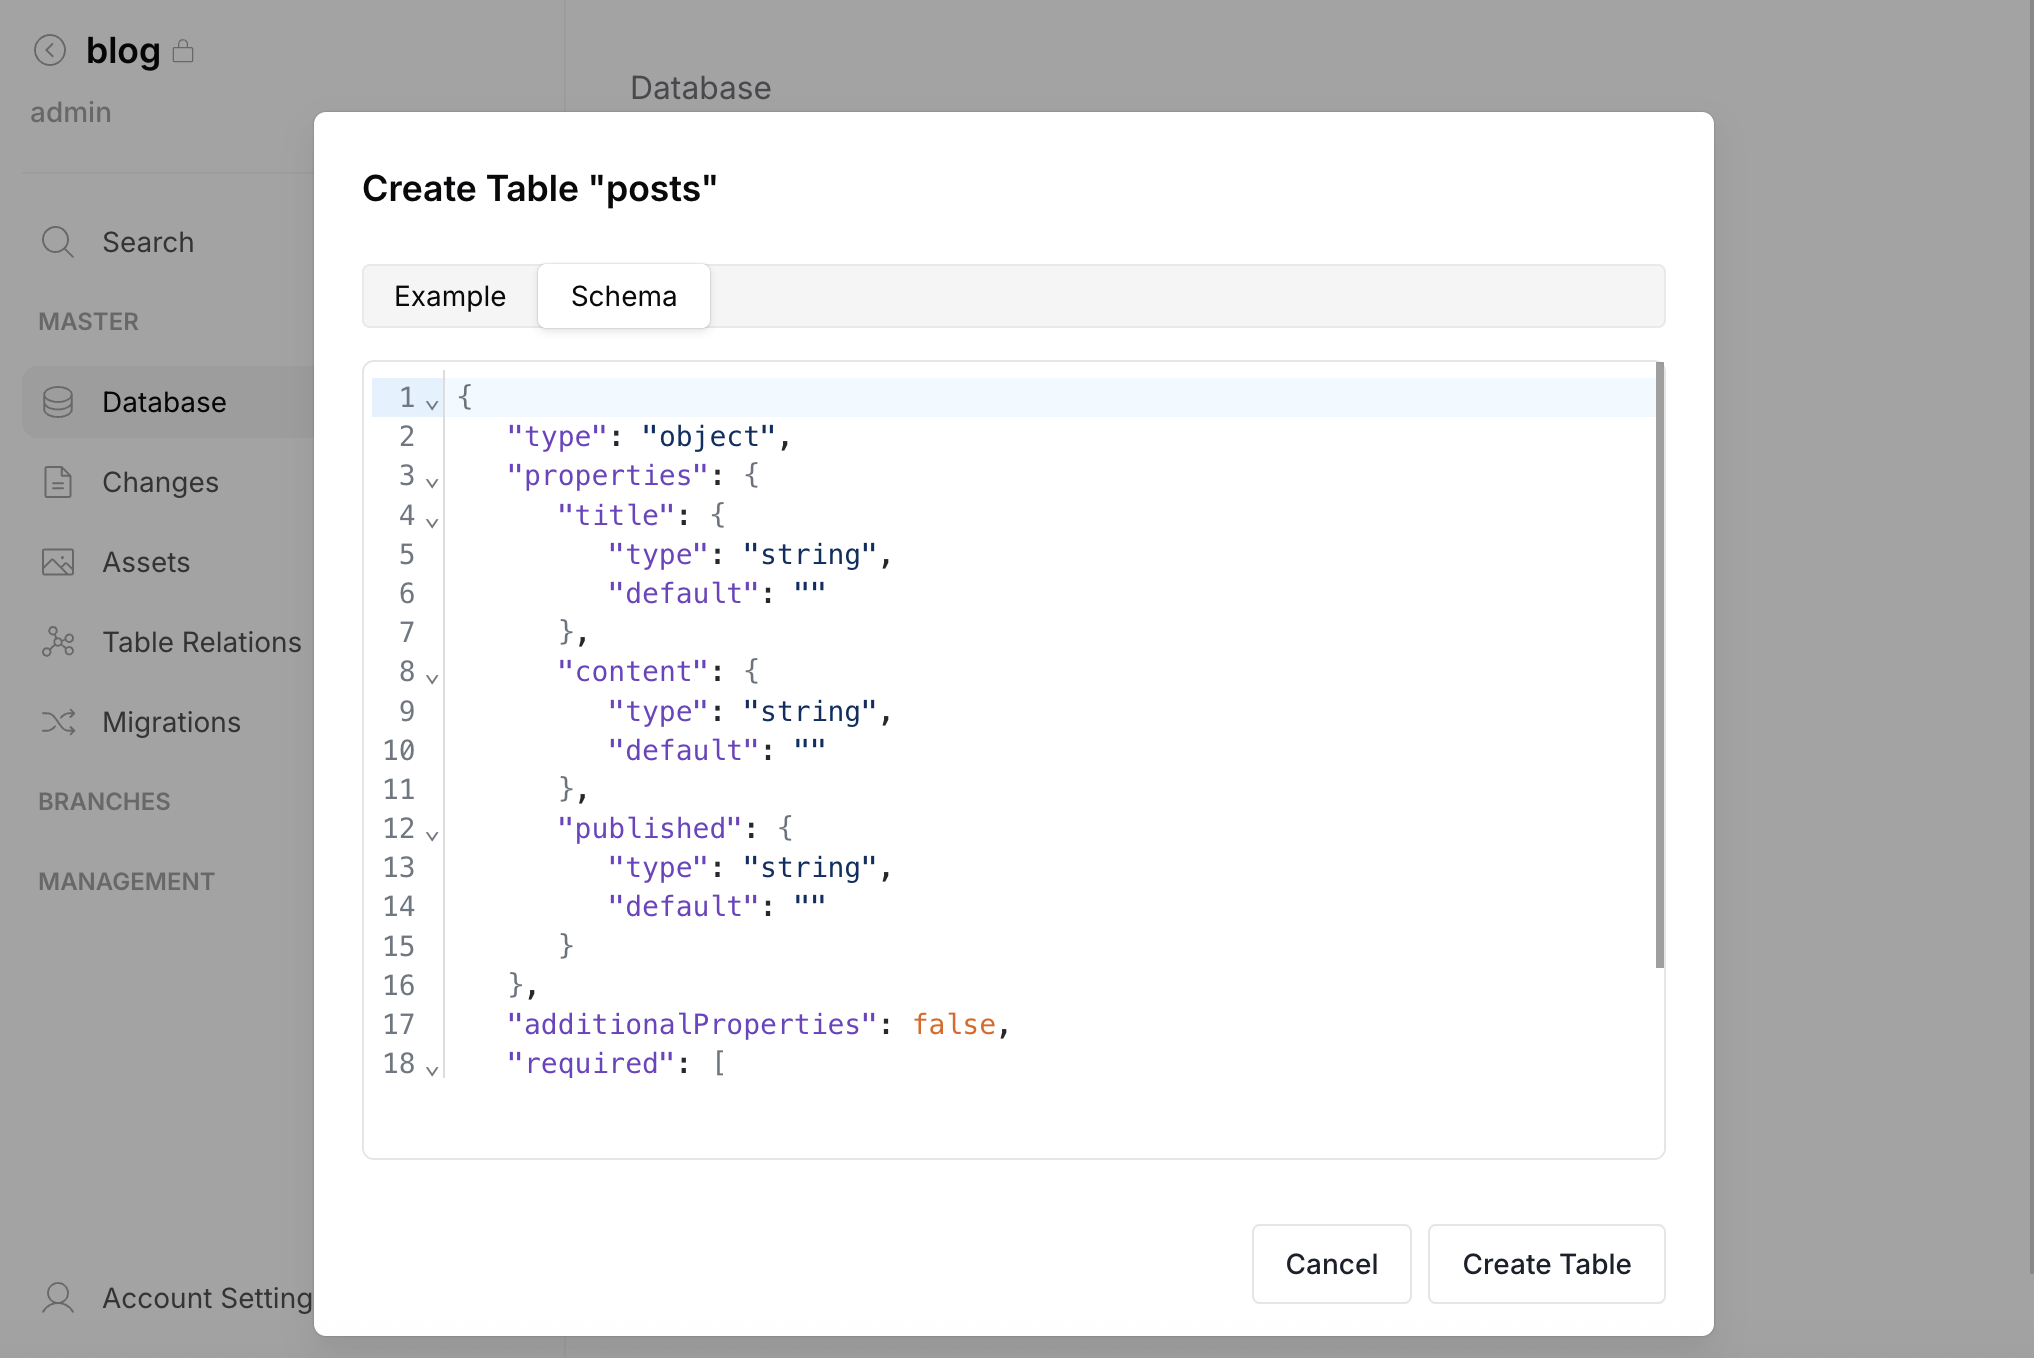
- Click Create Table — a review dialog will show the schema and data preview
- Confirm to create the table

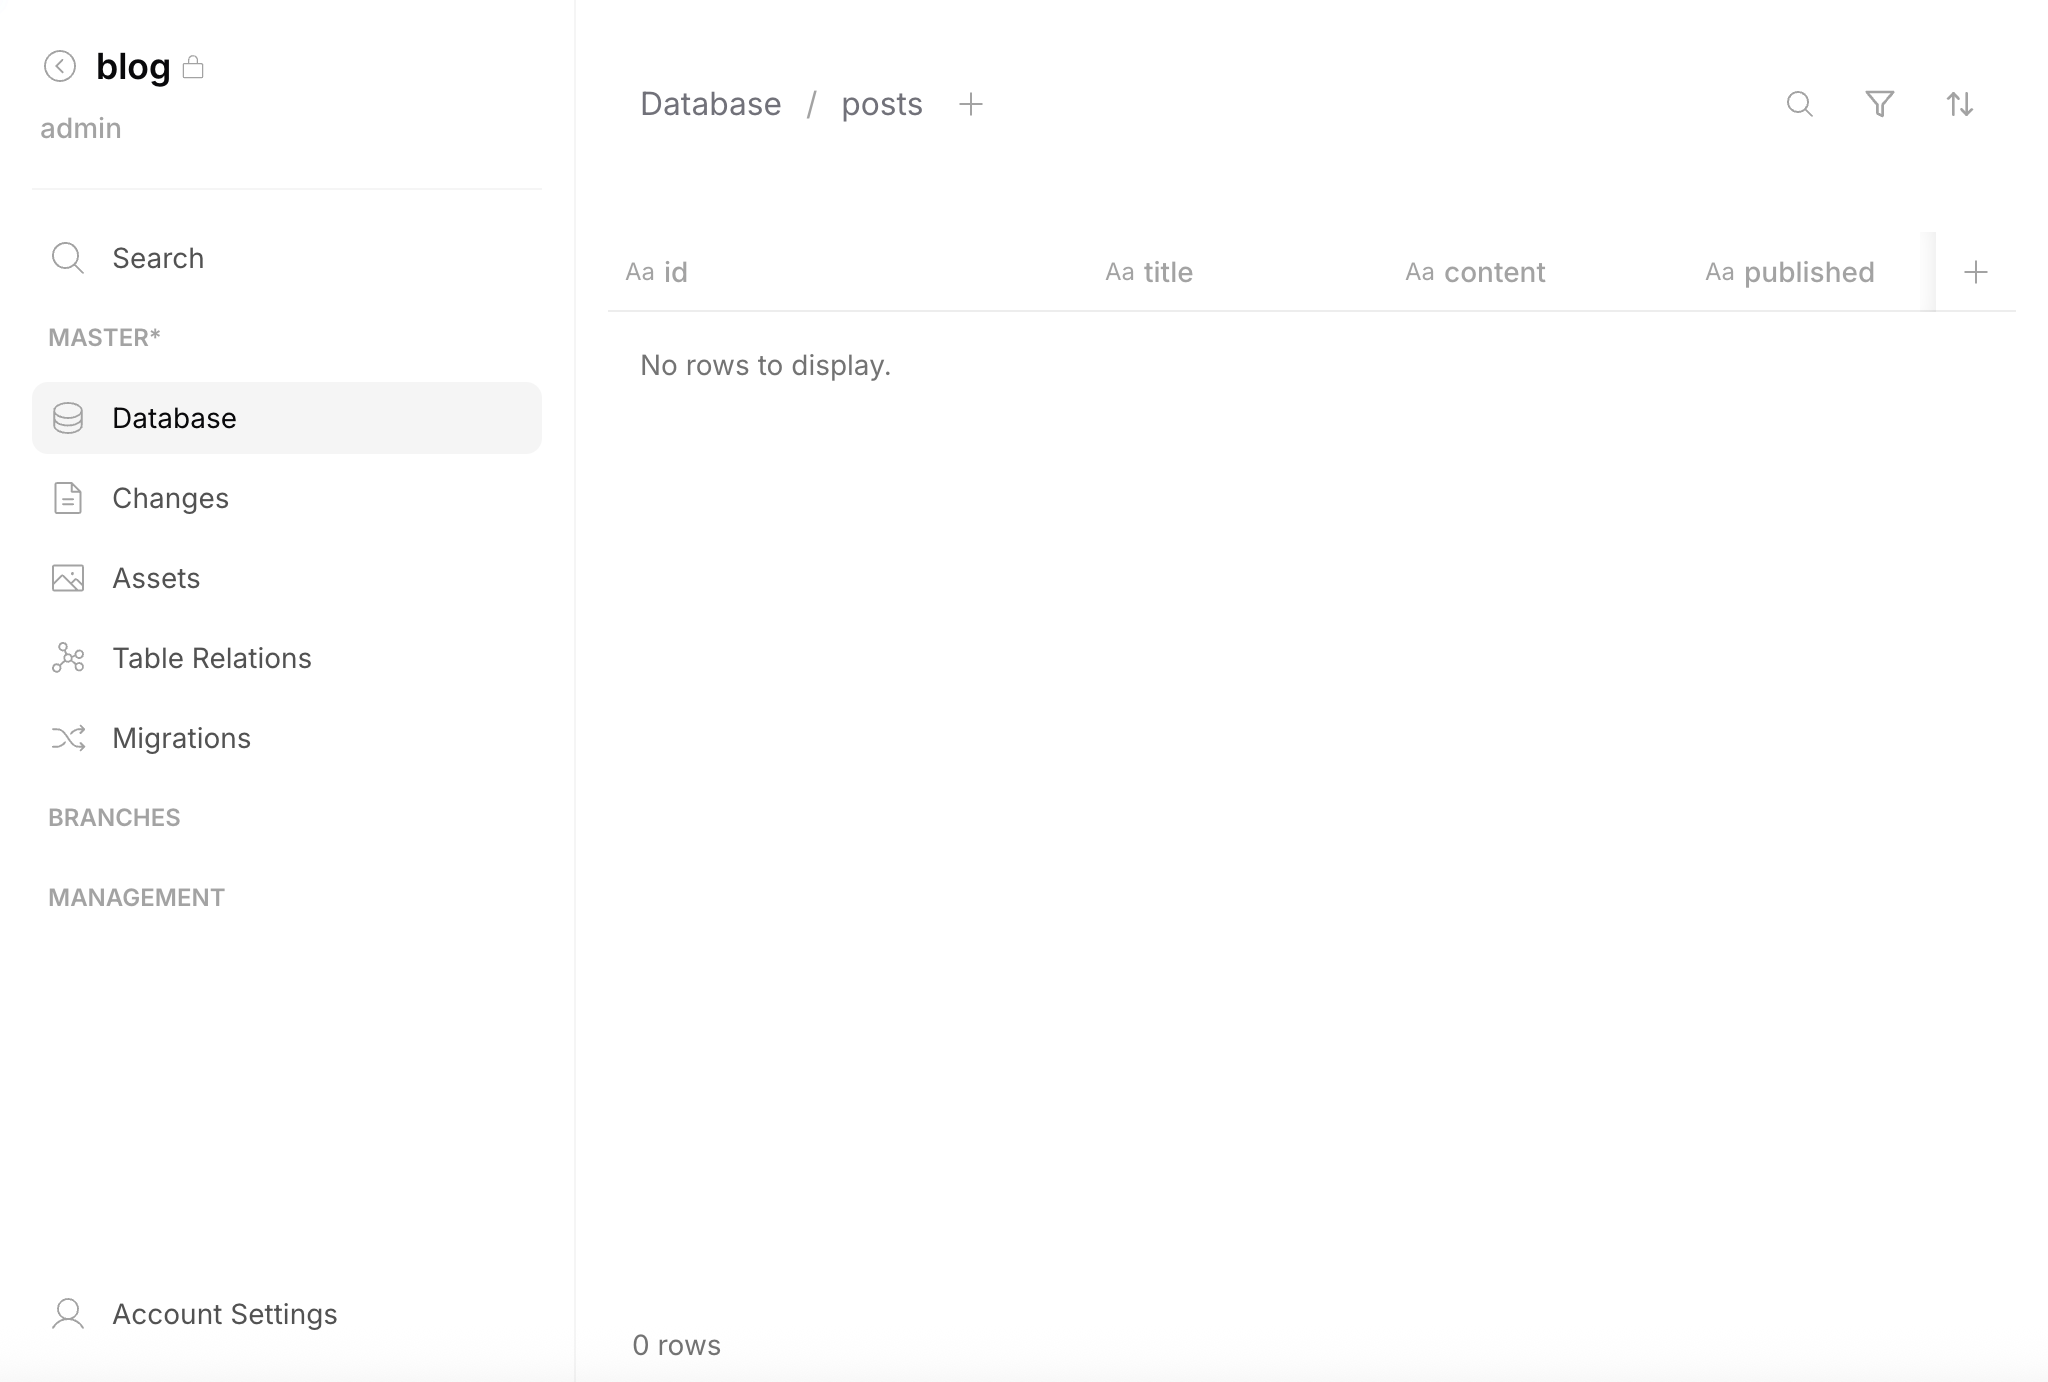
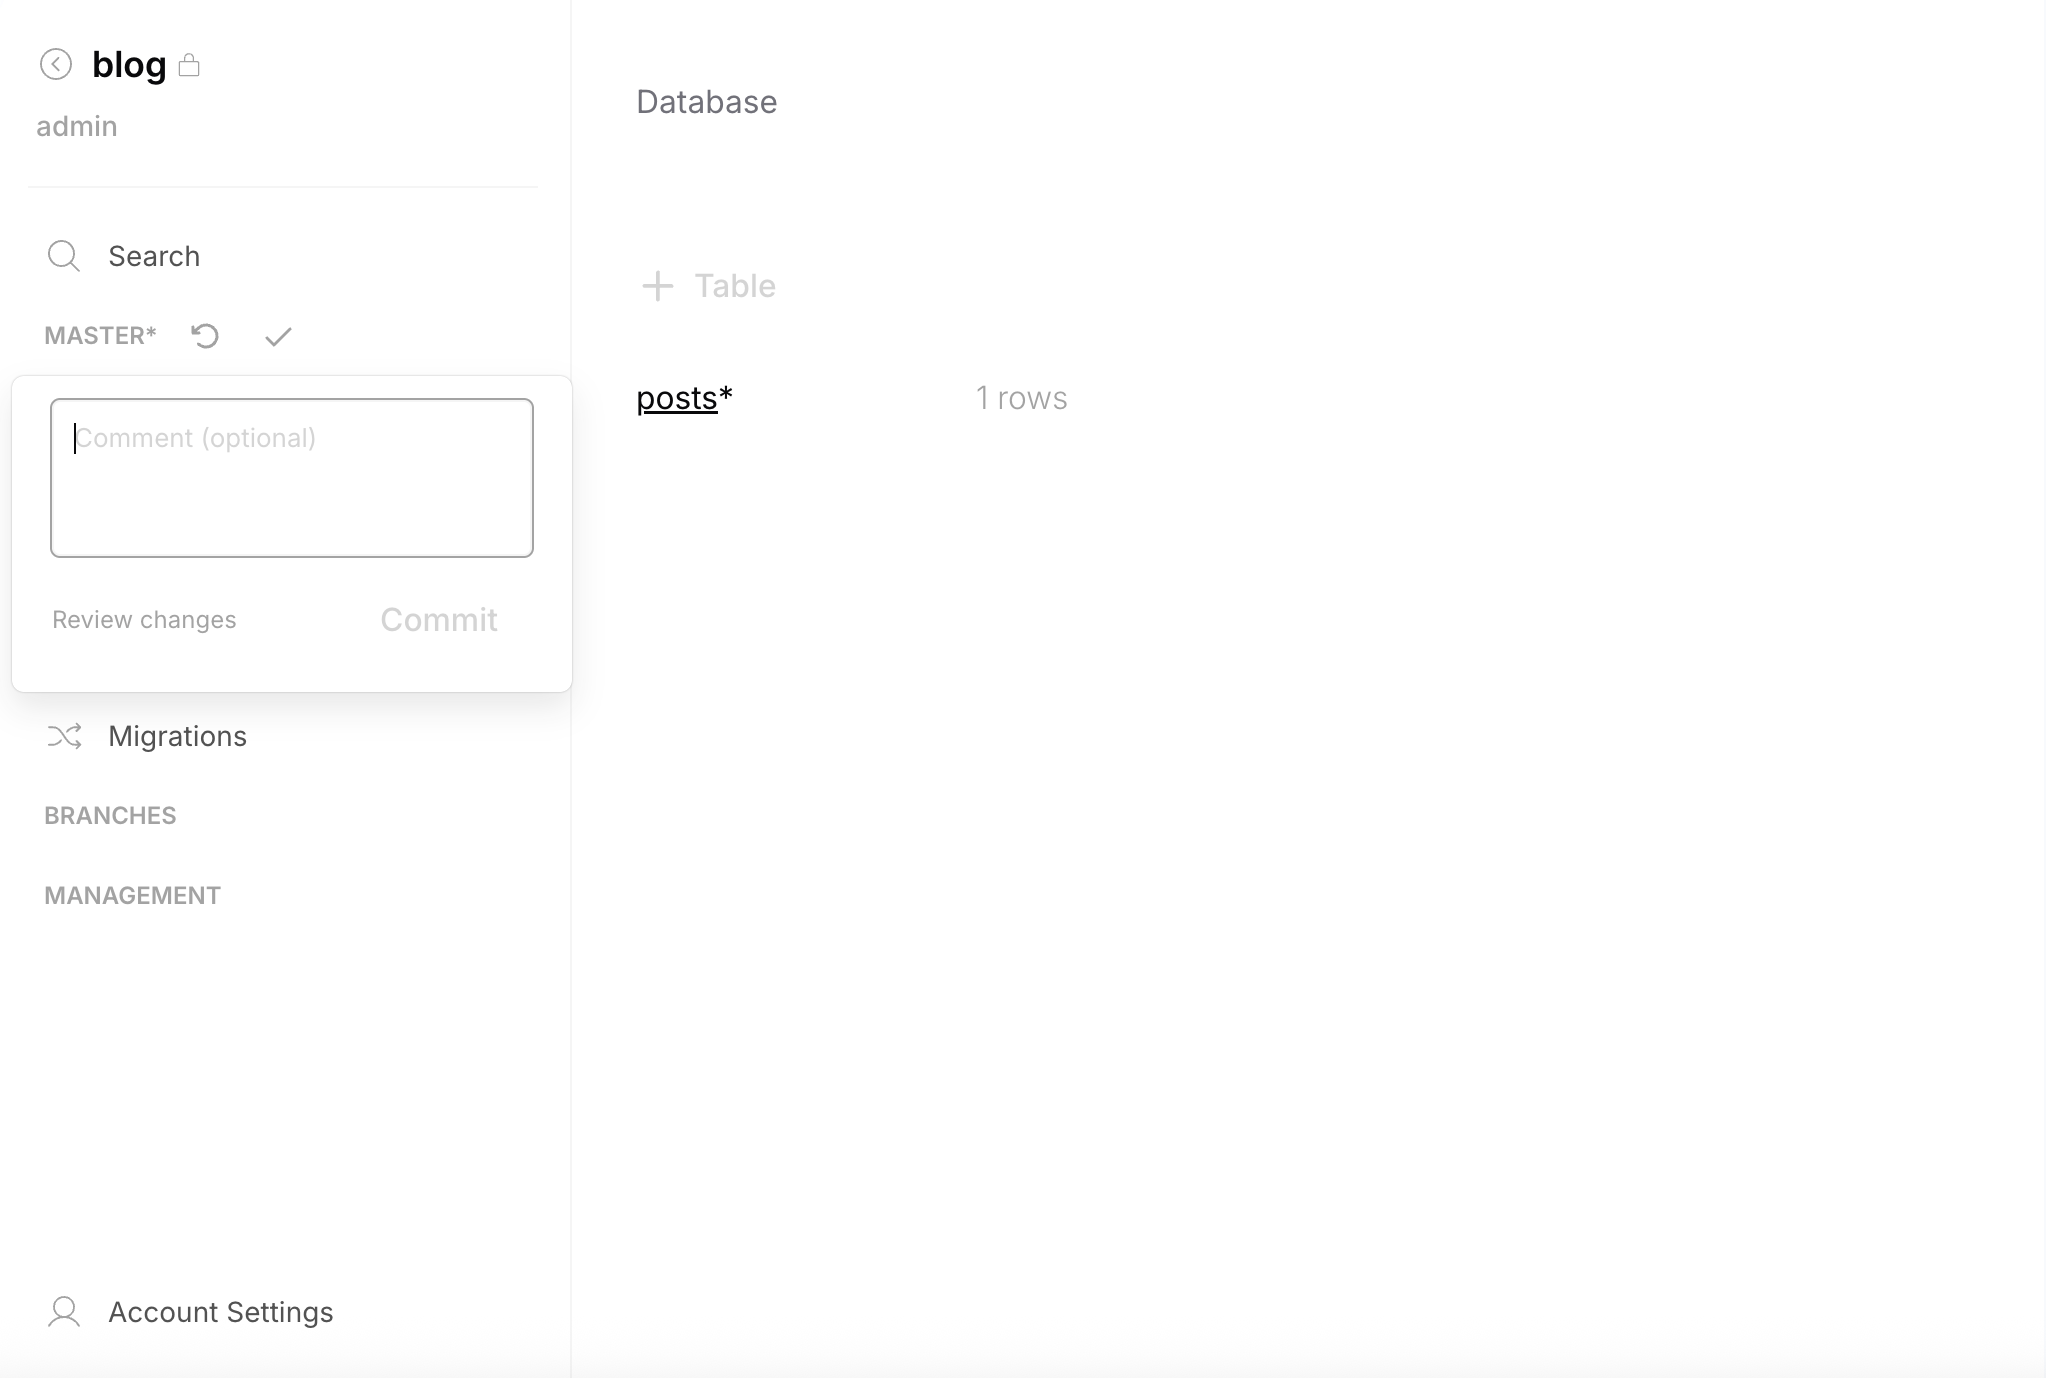
5. Add Content
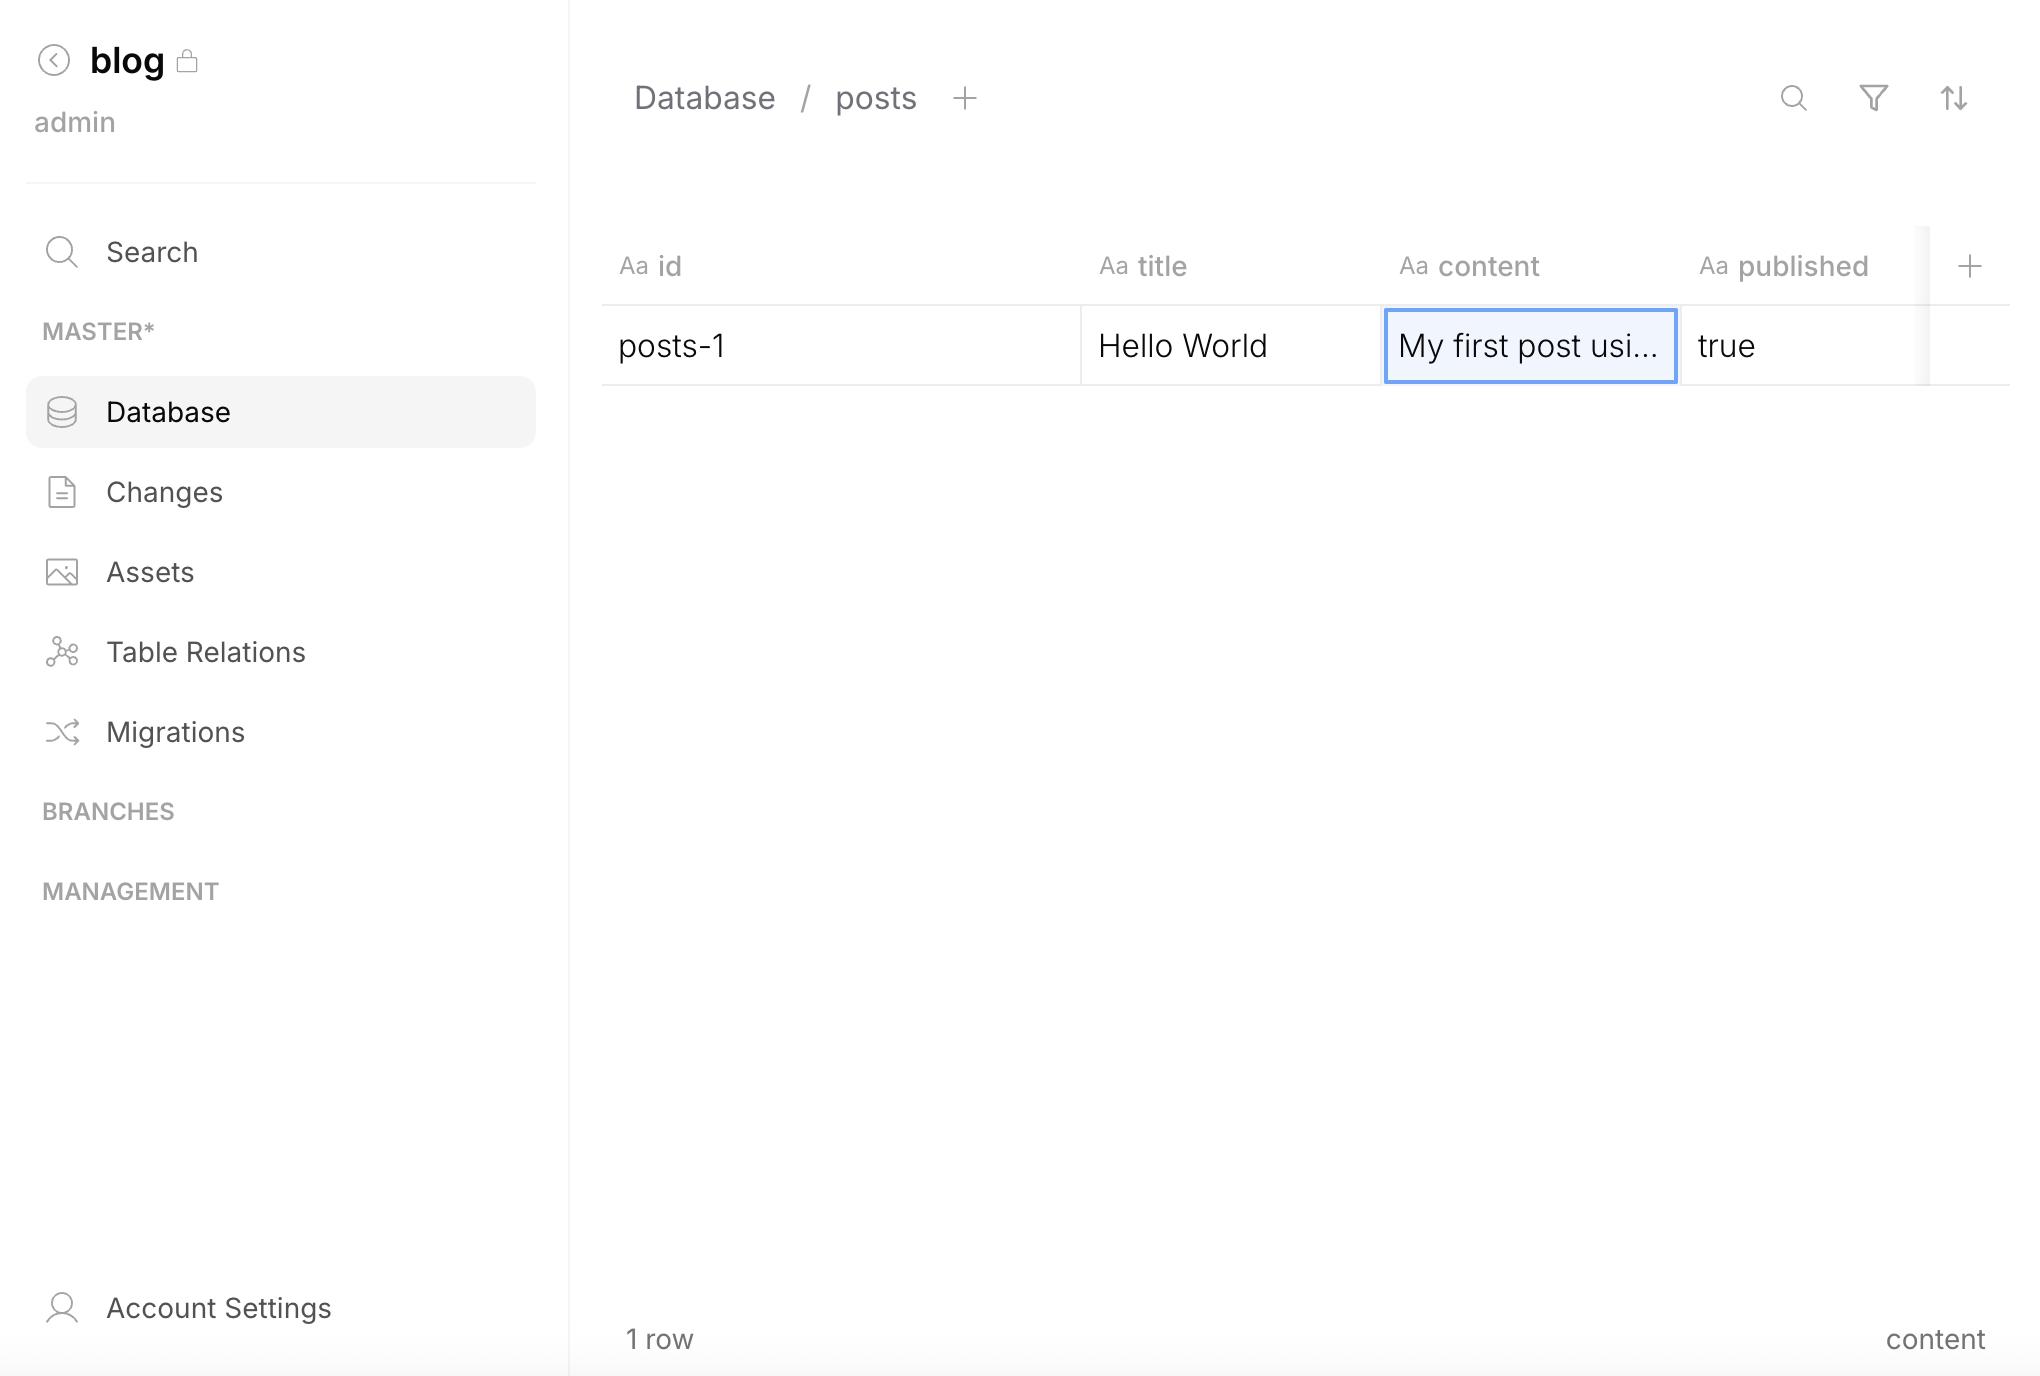
After creating the table, the Table Editor opens automatically (or select the table from the list in Database).
- Click + in the header to create a new row
- Enter a row id (e.g.,
posts-1) — you can rename it later - Fill in the fields or leave defaults, then confirm
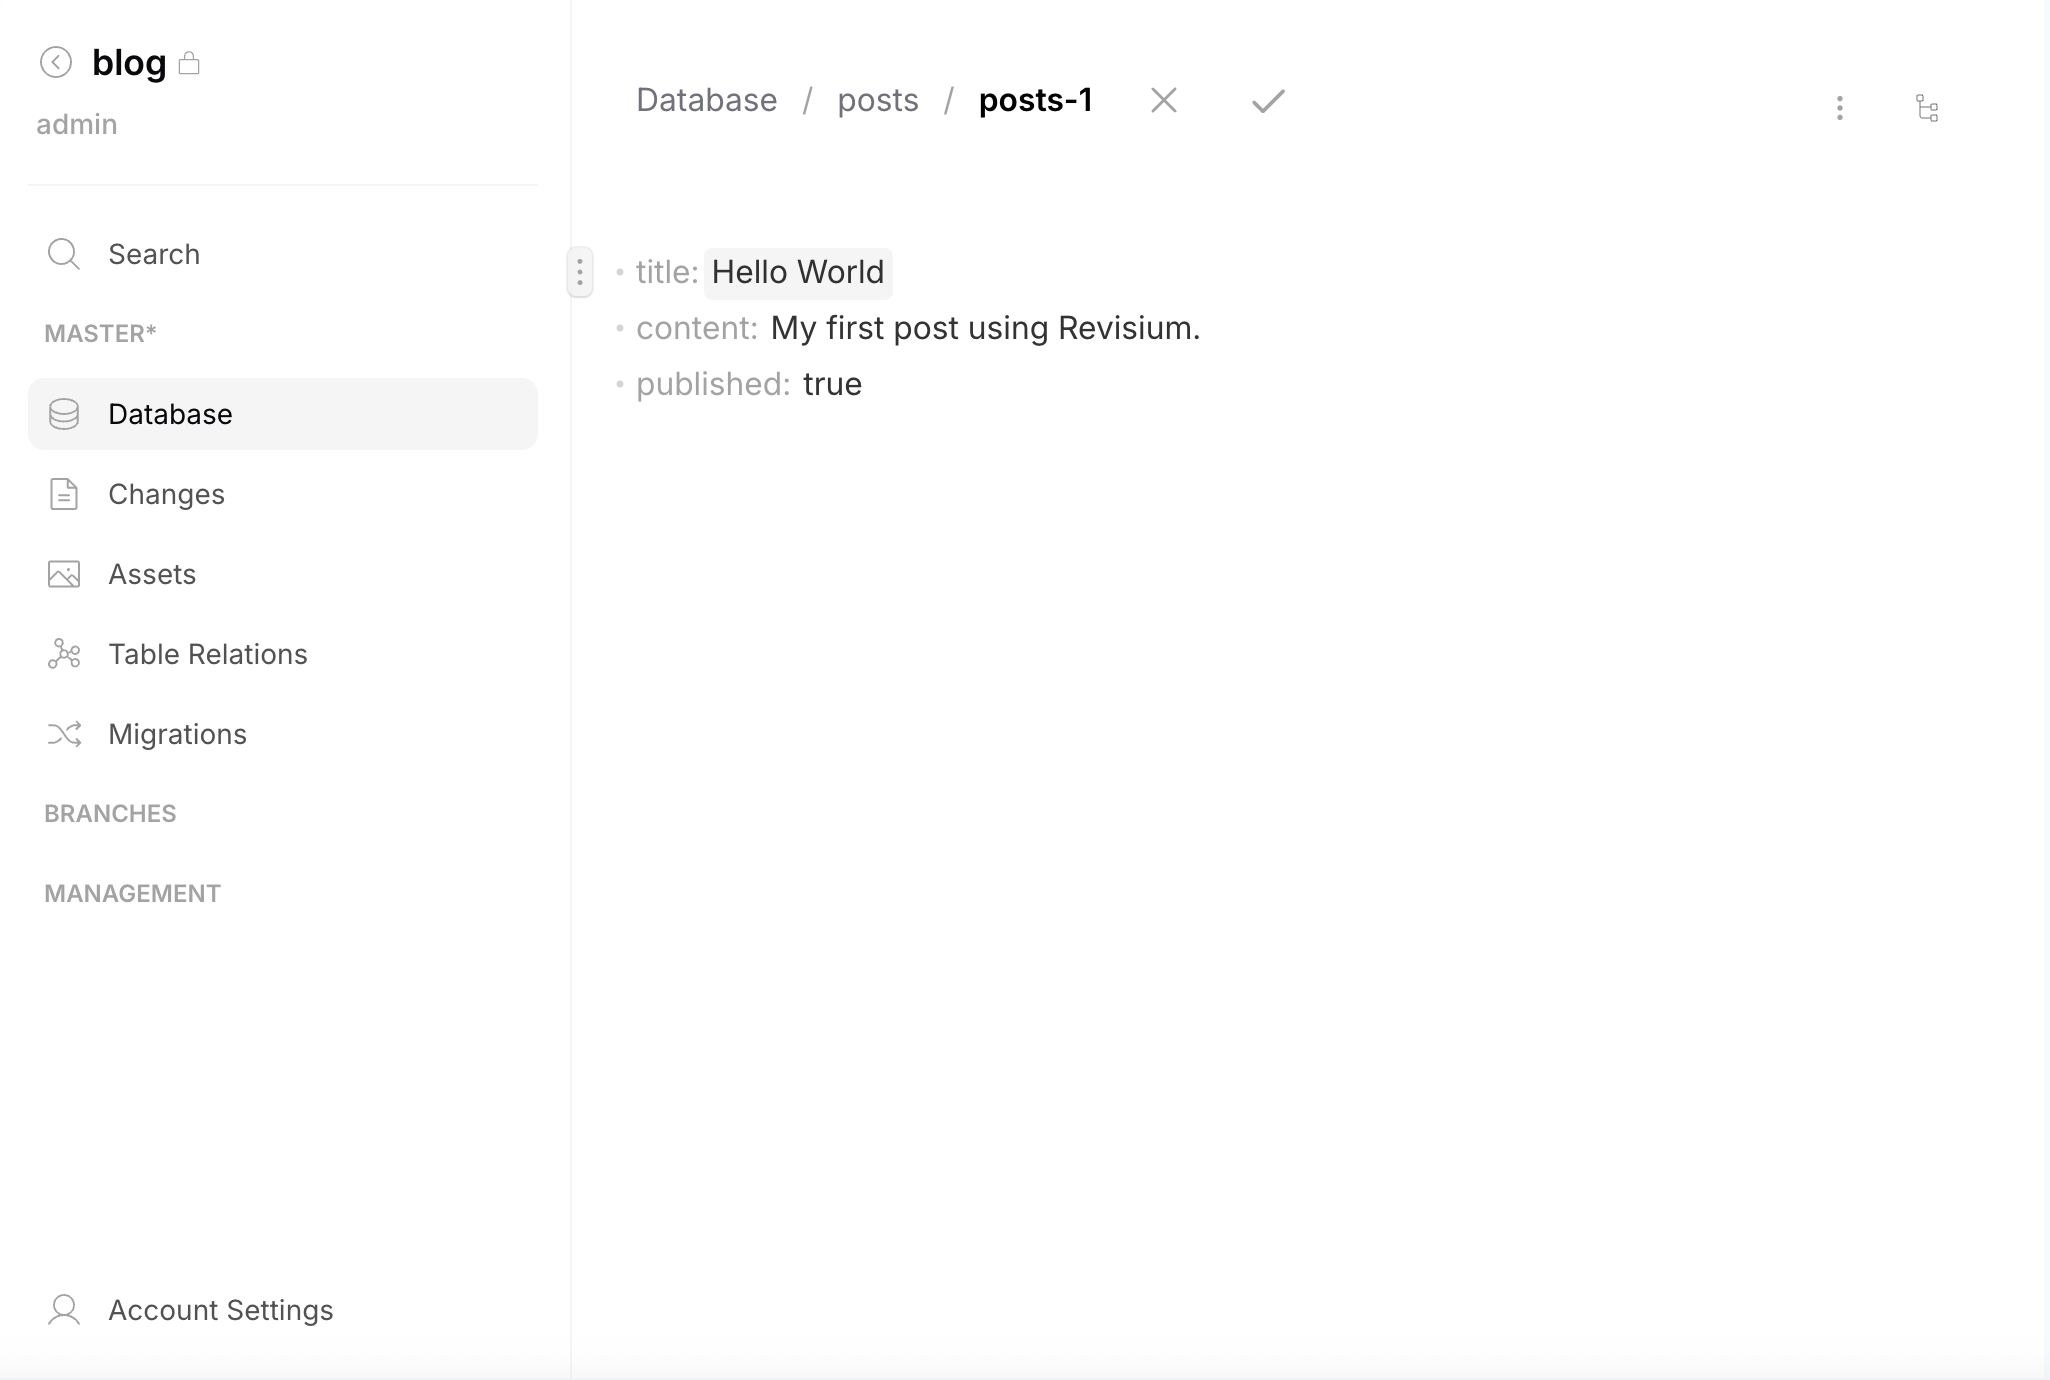
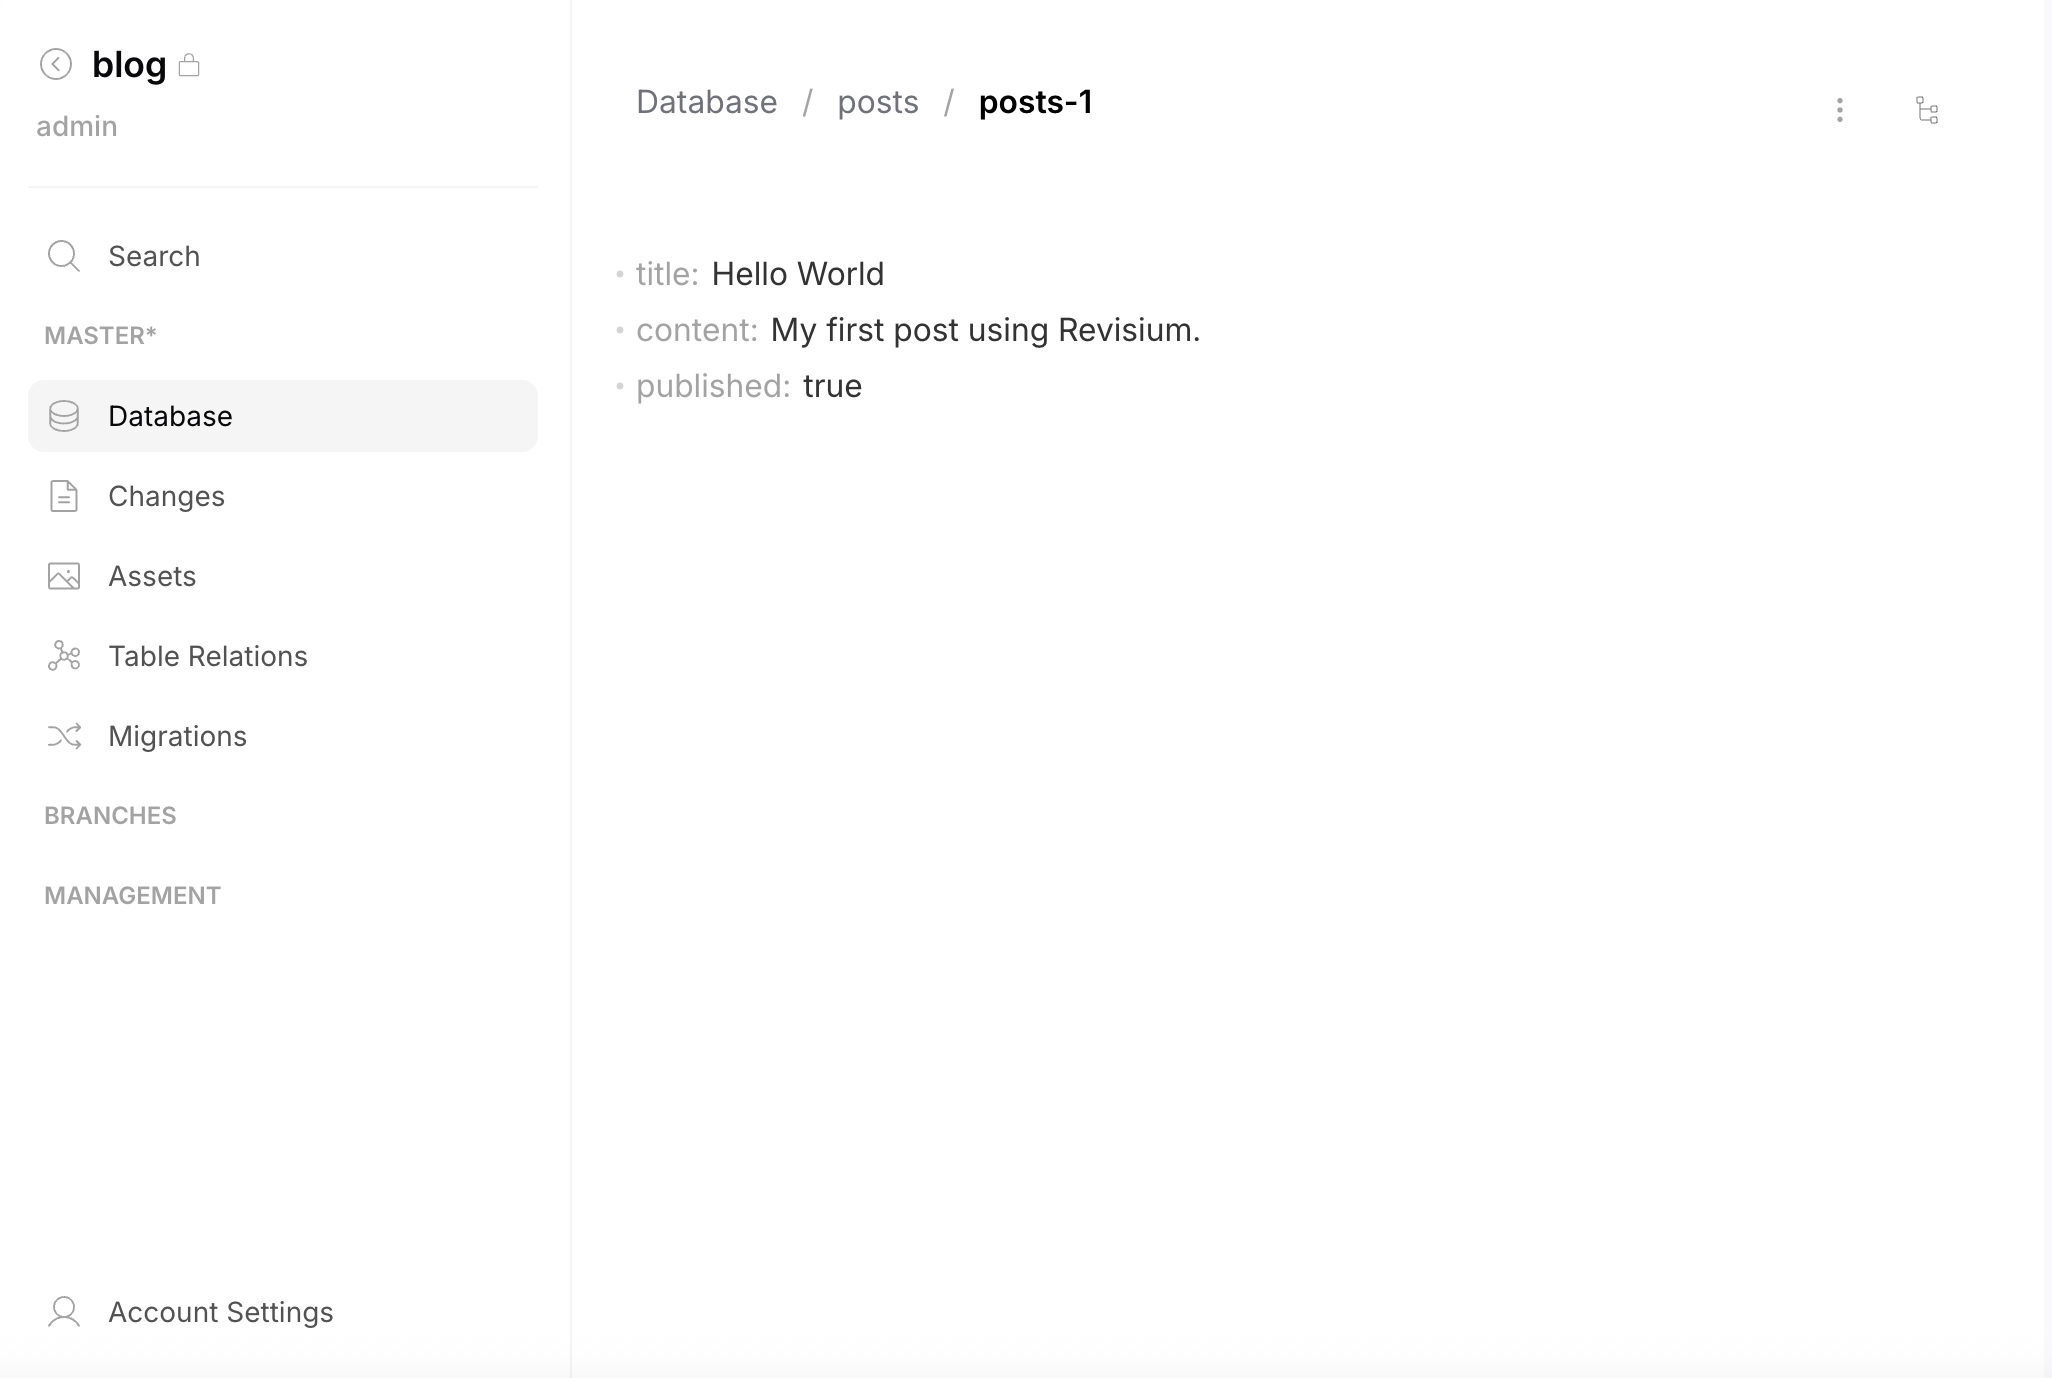
The row appears in the table. You can edit values directly in cells by clicking on them.
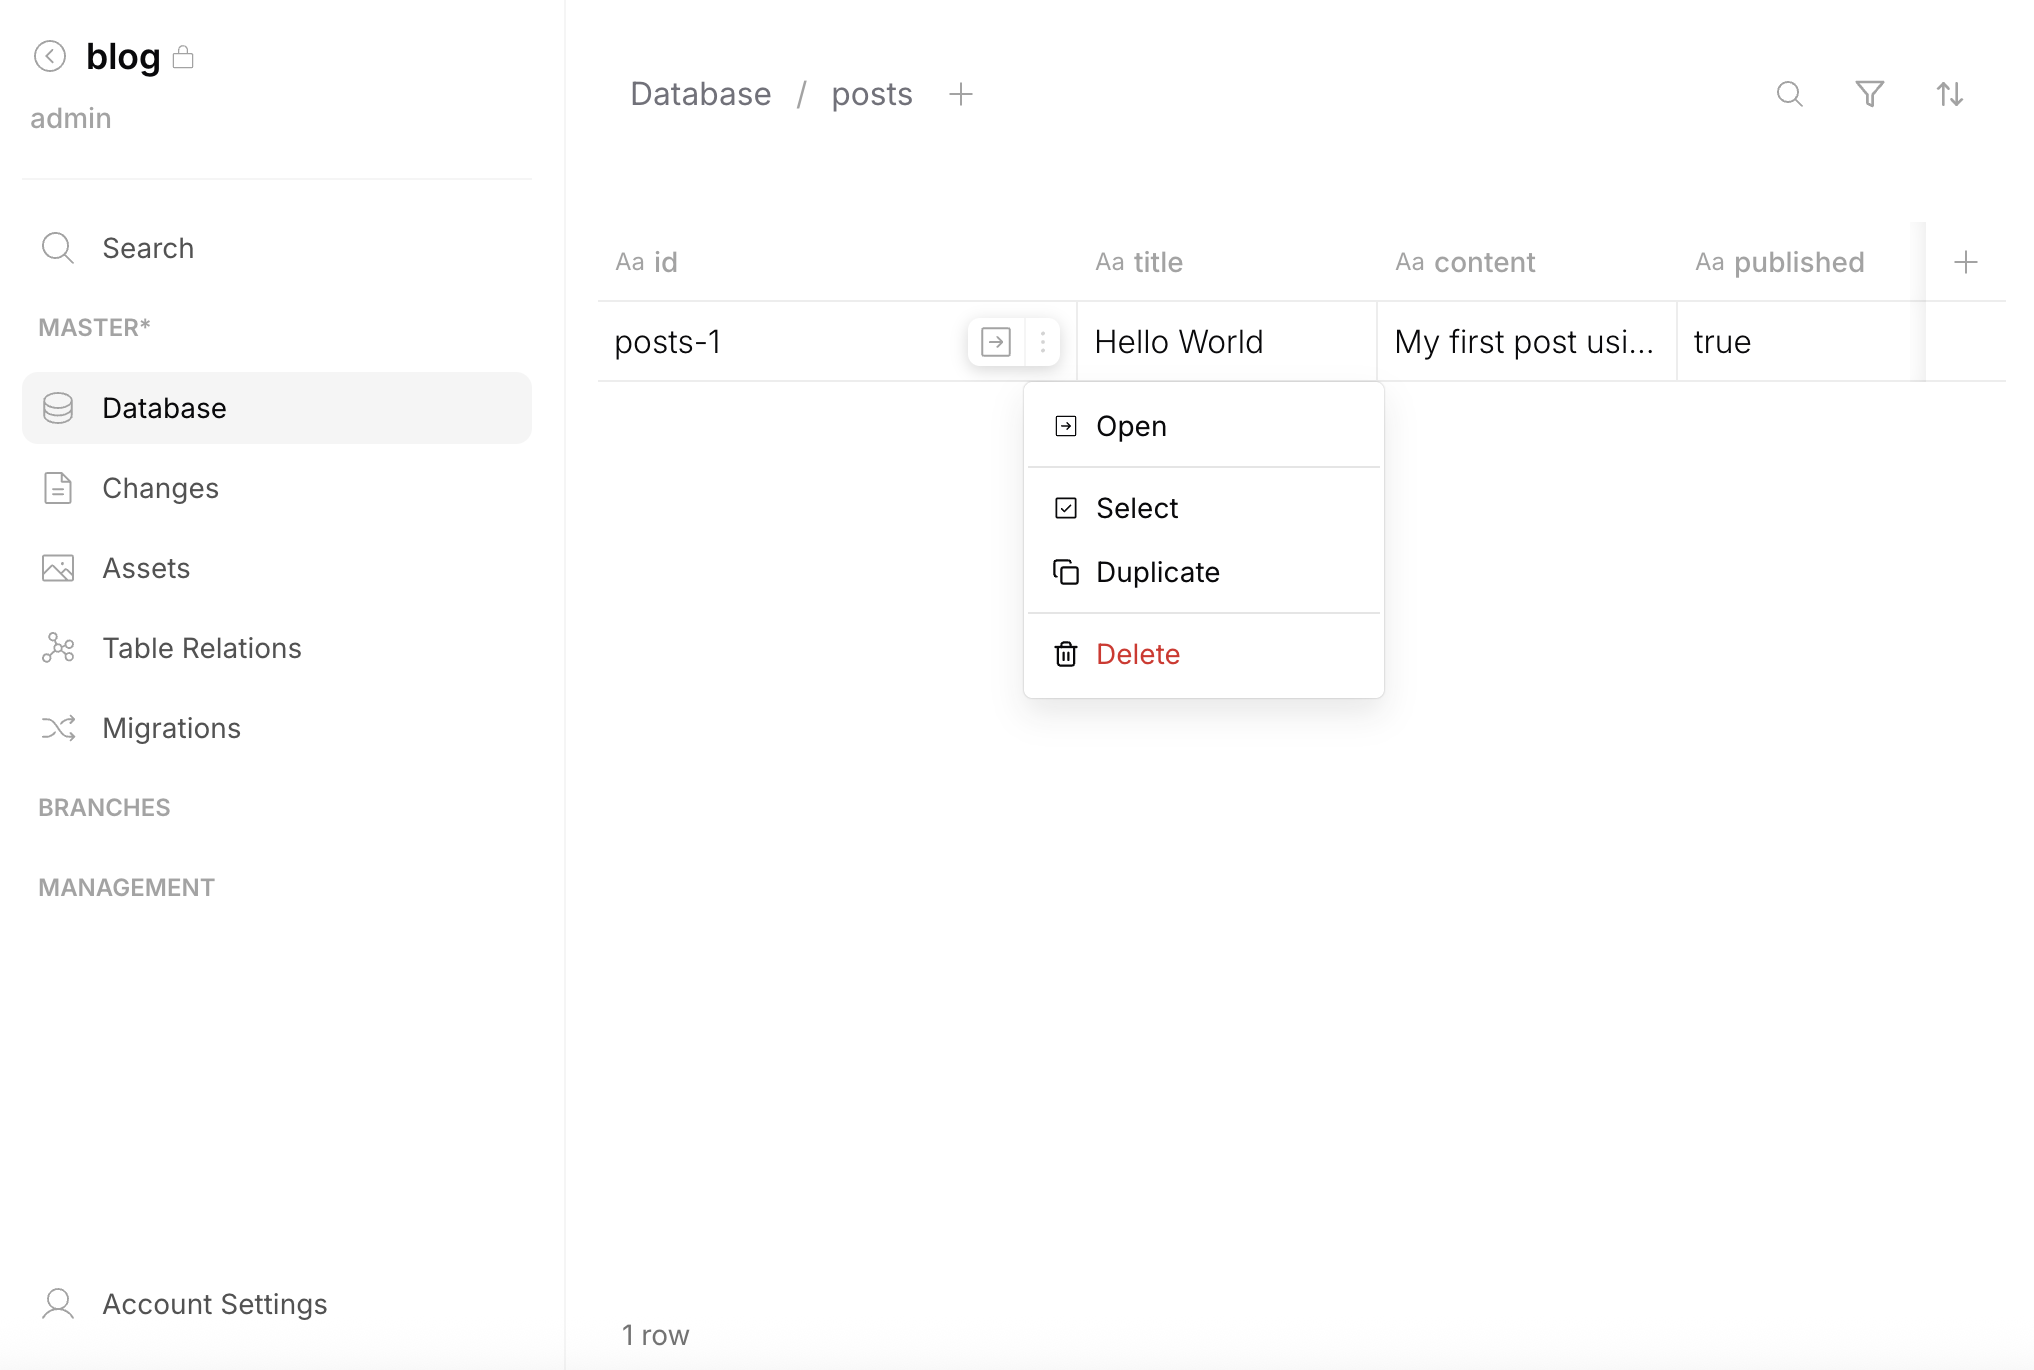
To open the full Row Editor page, hover over the row id and click Open from the menu (or use the arrow icon).
6. Commit Changes
Committing is optional — you can keep working in draft without committing. But when you need version history, rollback, or want to serve data via a HEAD endpoint, commit your changes.
You can commit directly from the sidebar — click the checkmark next to the branch name, add an optional comment, and click Commit.
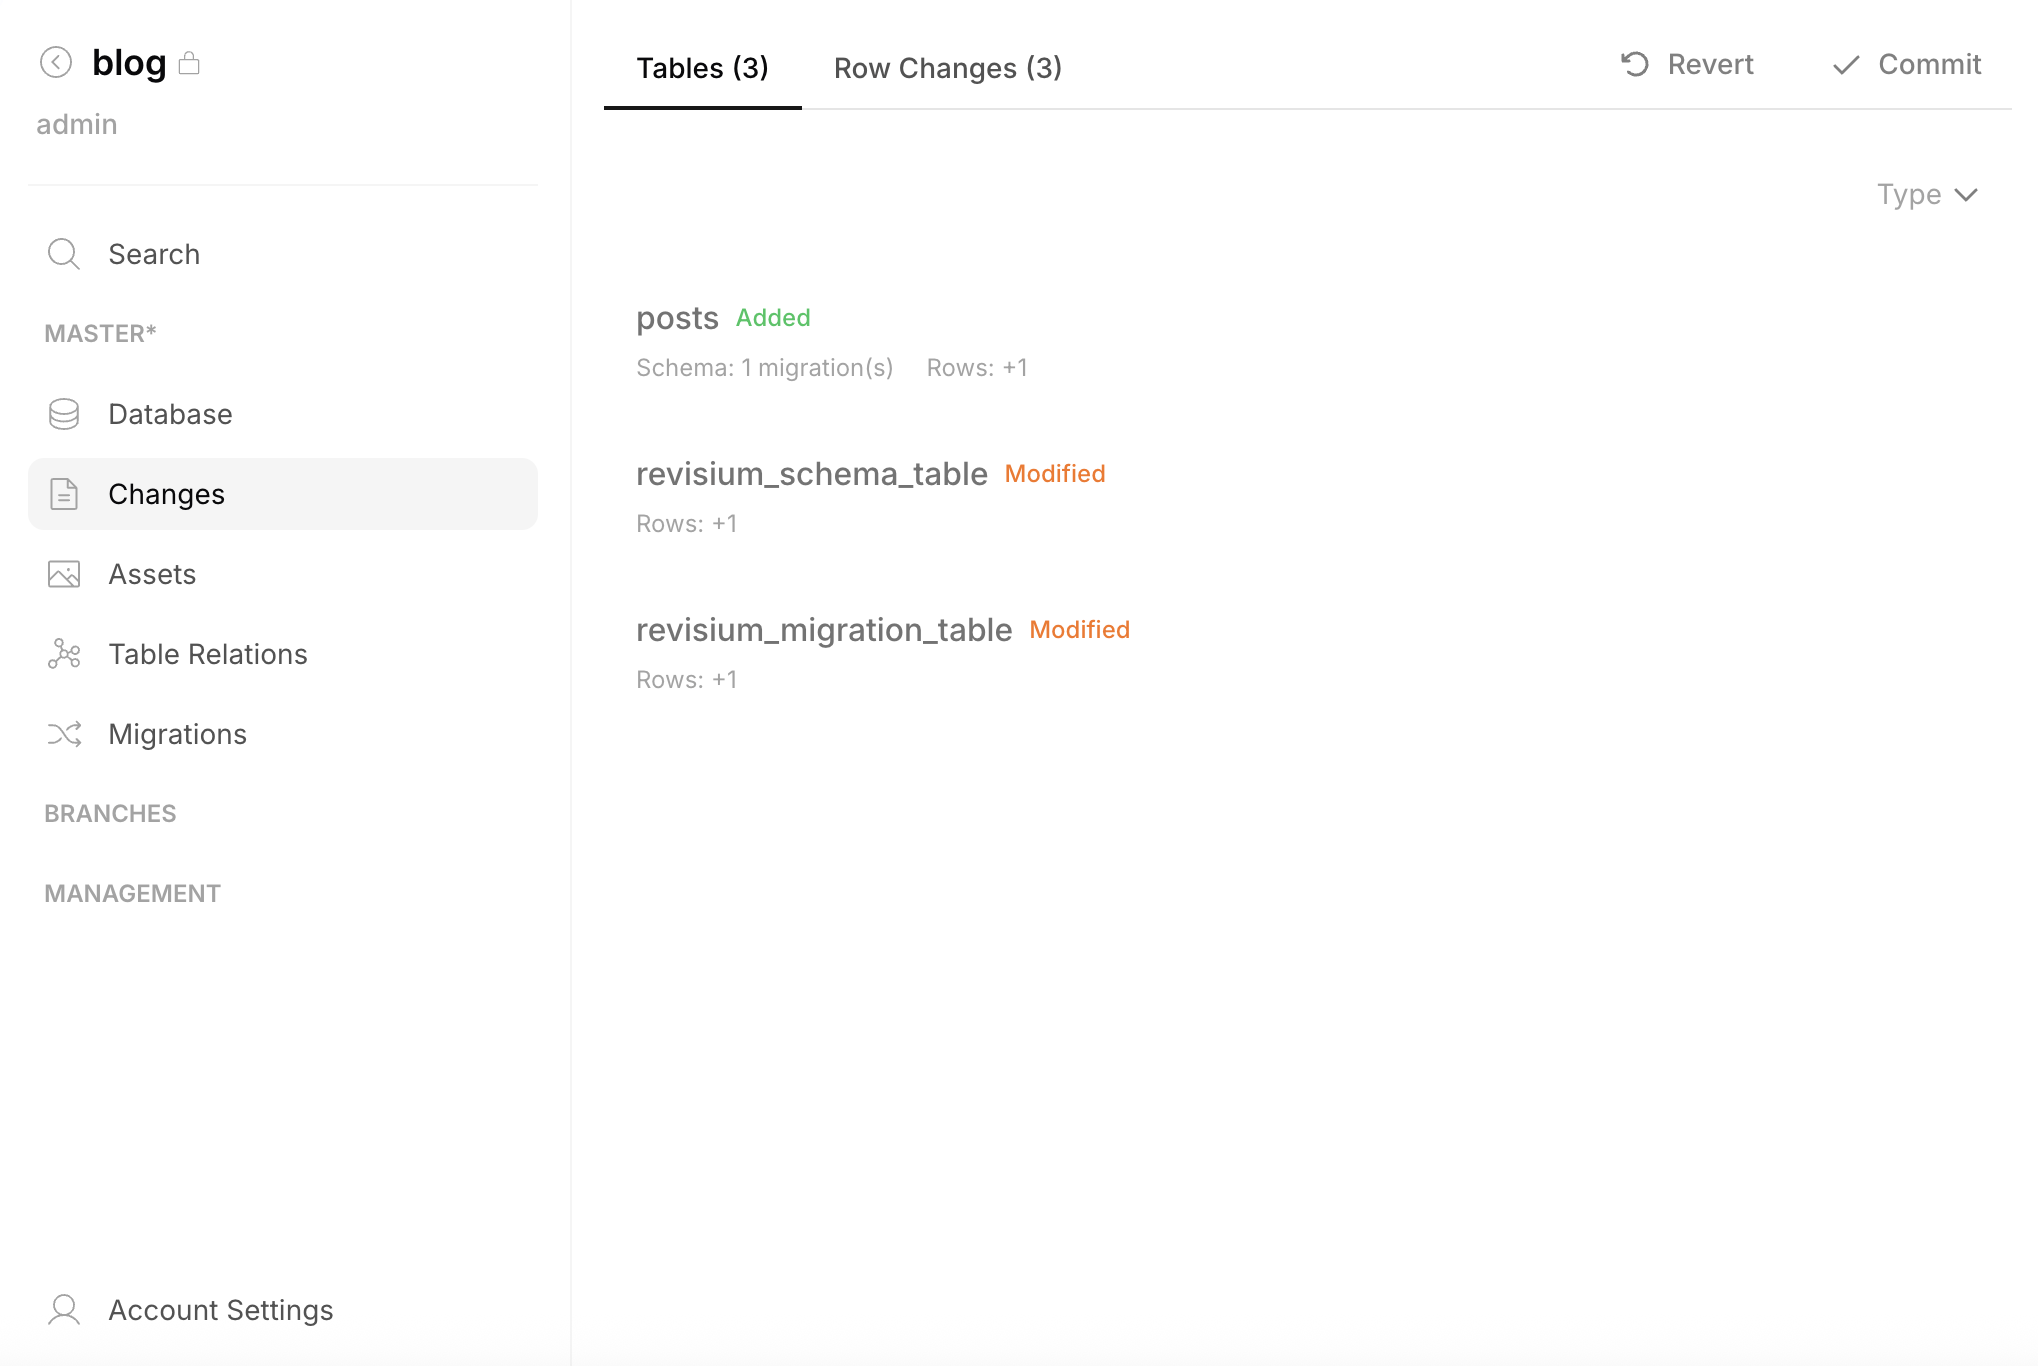
To review changes before committing, go to Changes in the sidebar. The Tables tab shows added/modified tables, the Row Changes tab shows individual row diffs.
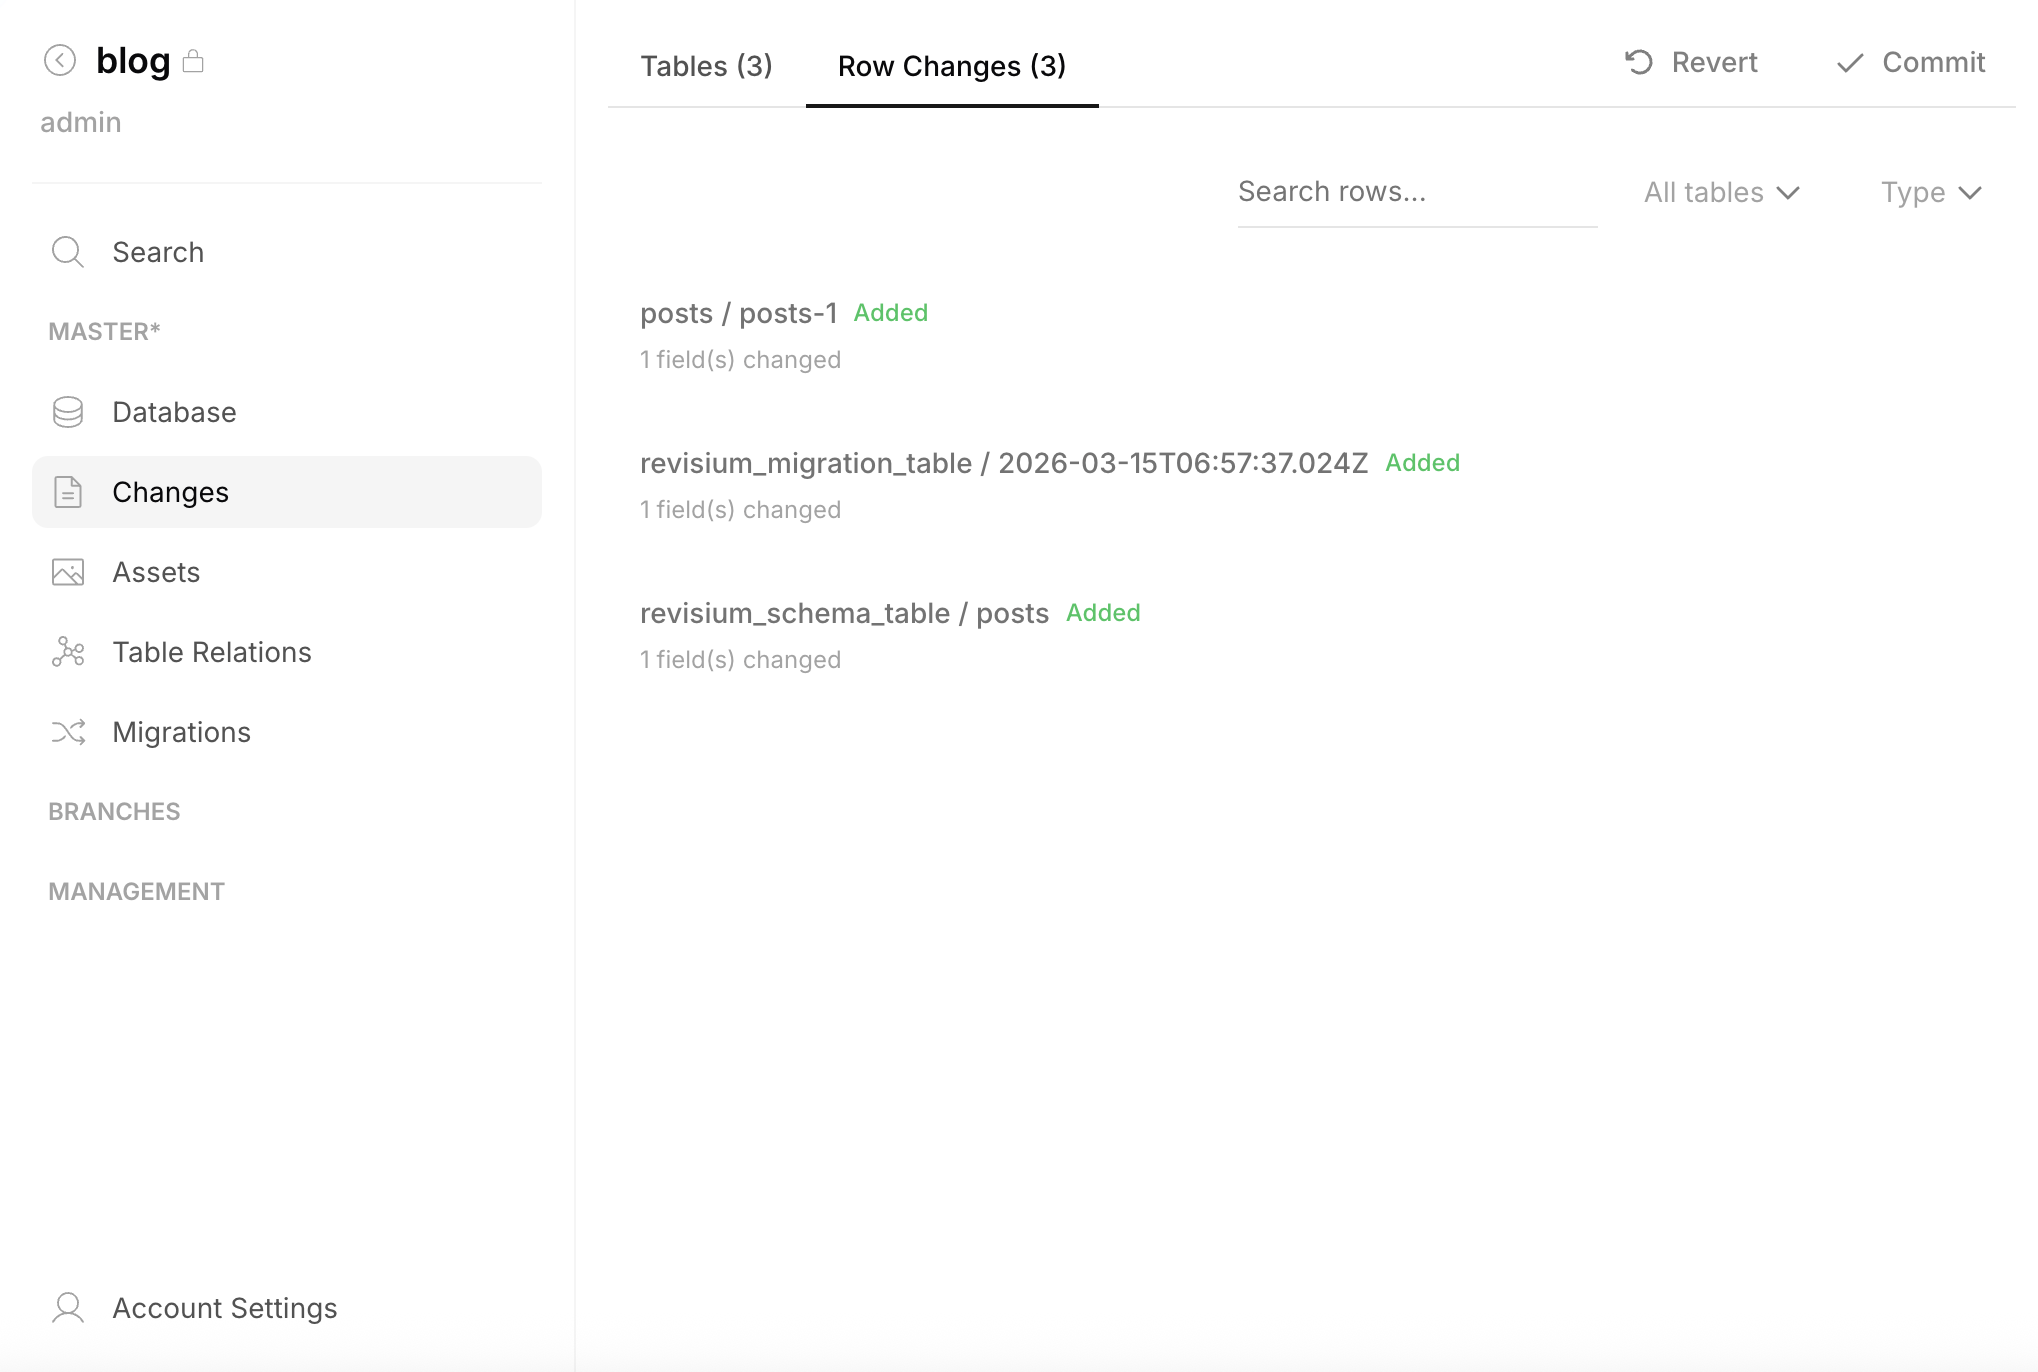
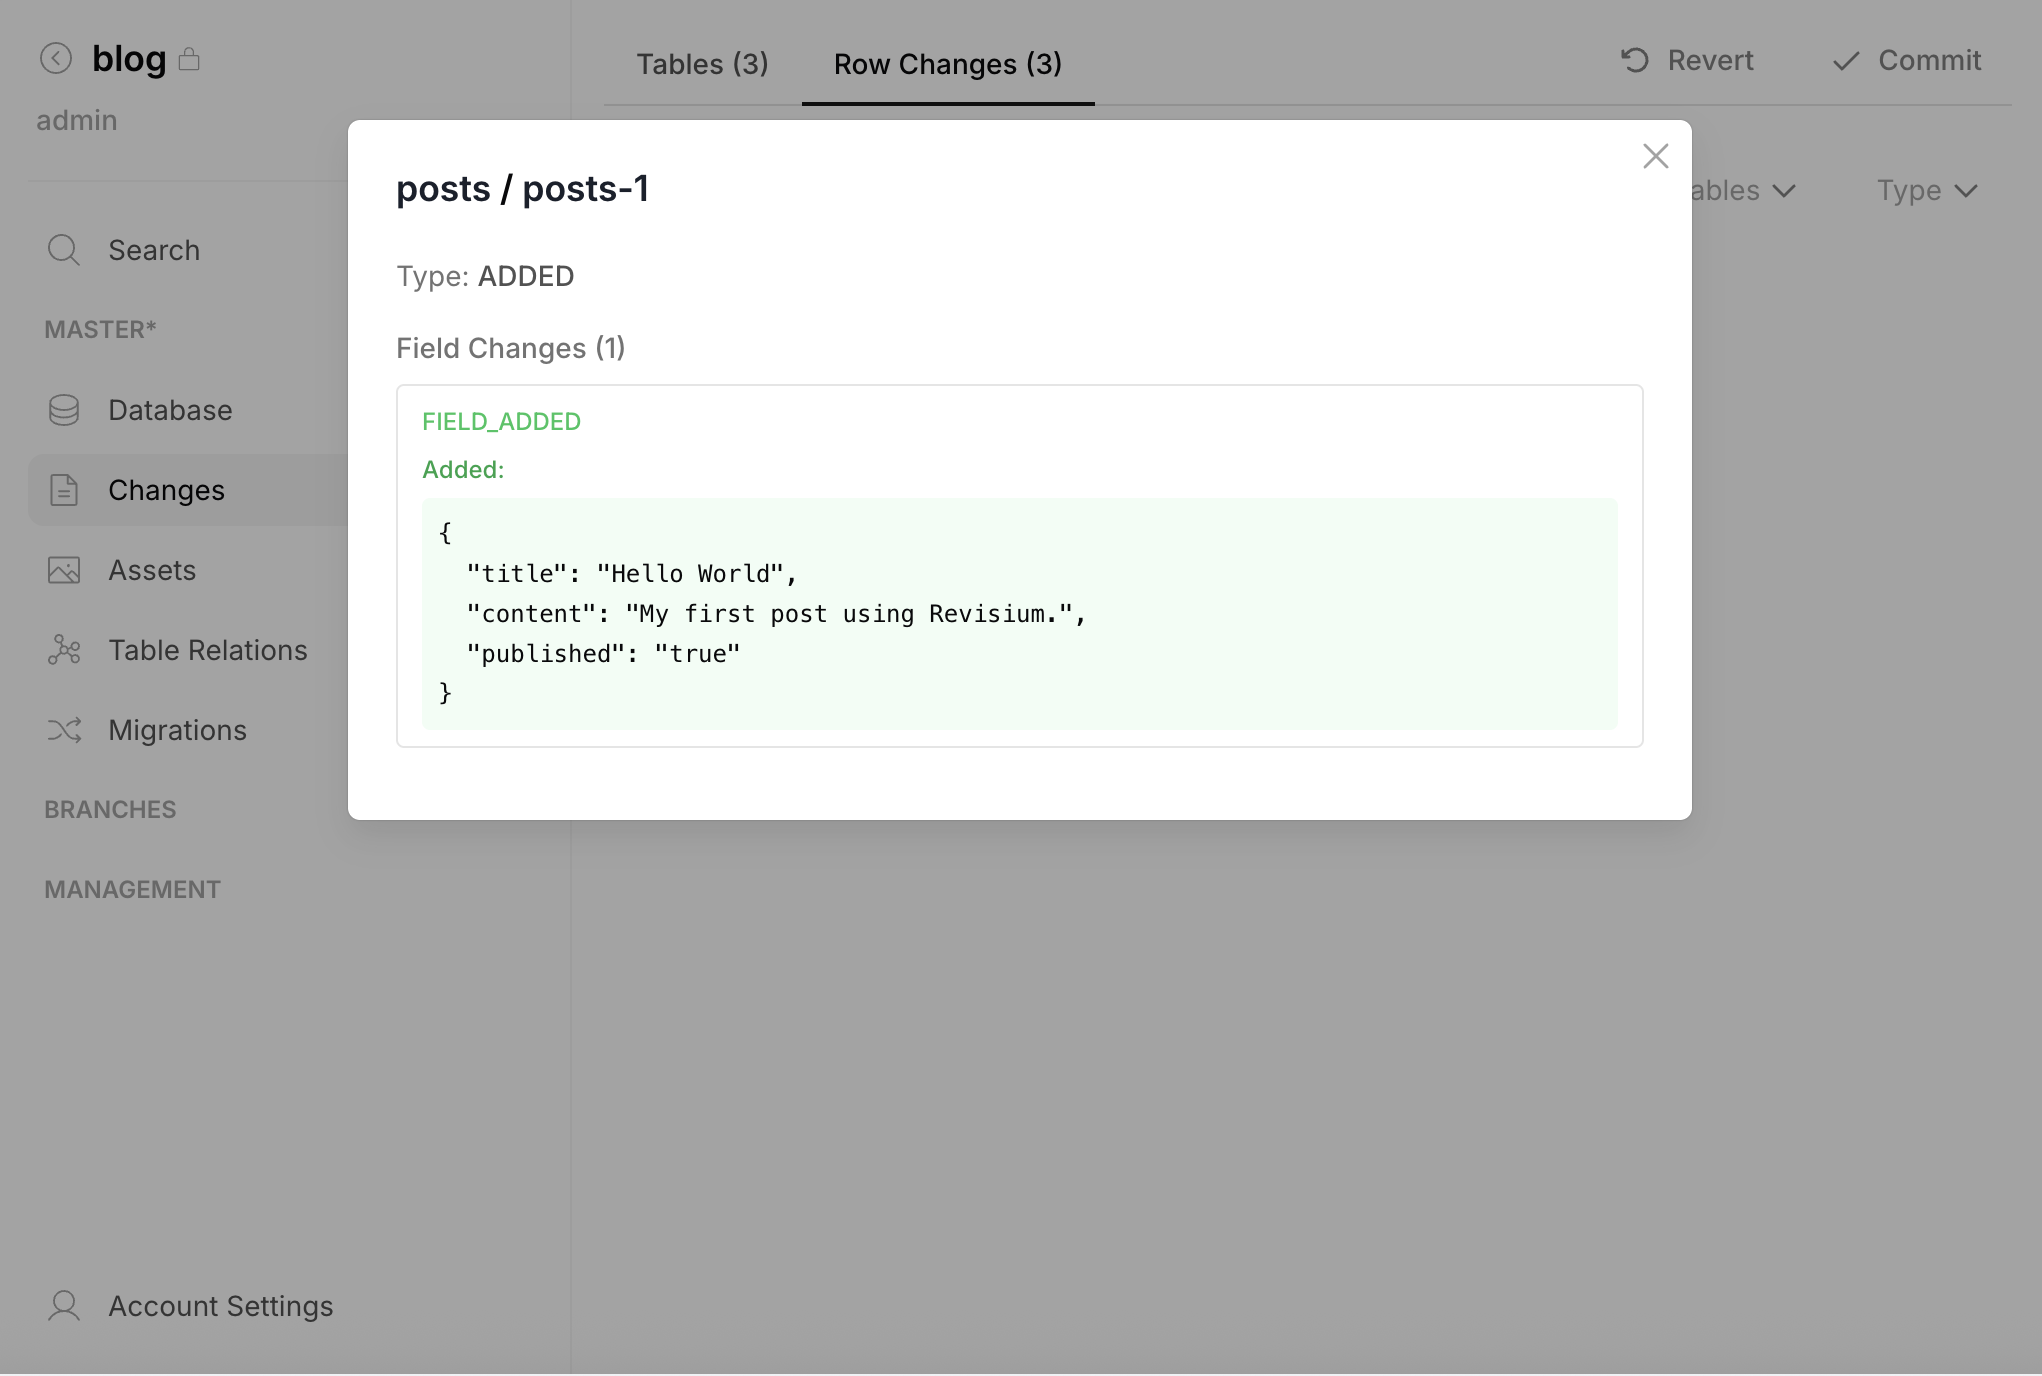
Click any row change to see the field-level diff. Then click Commit in the top right and enter an optional comment.
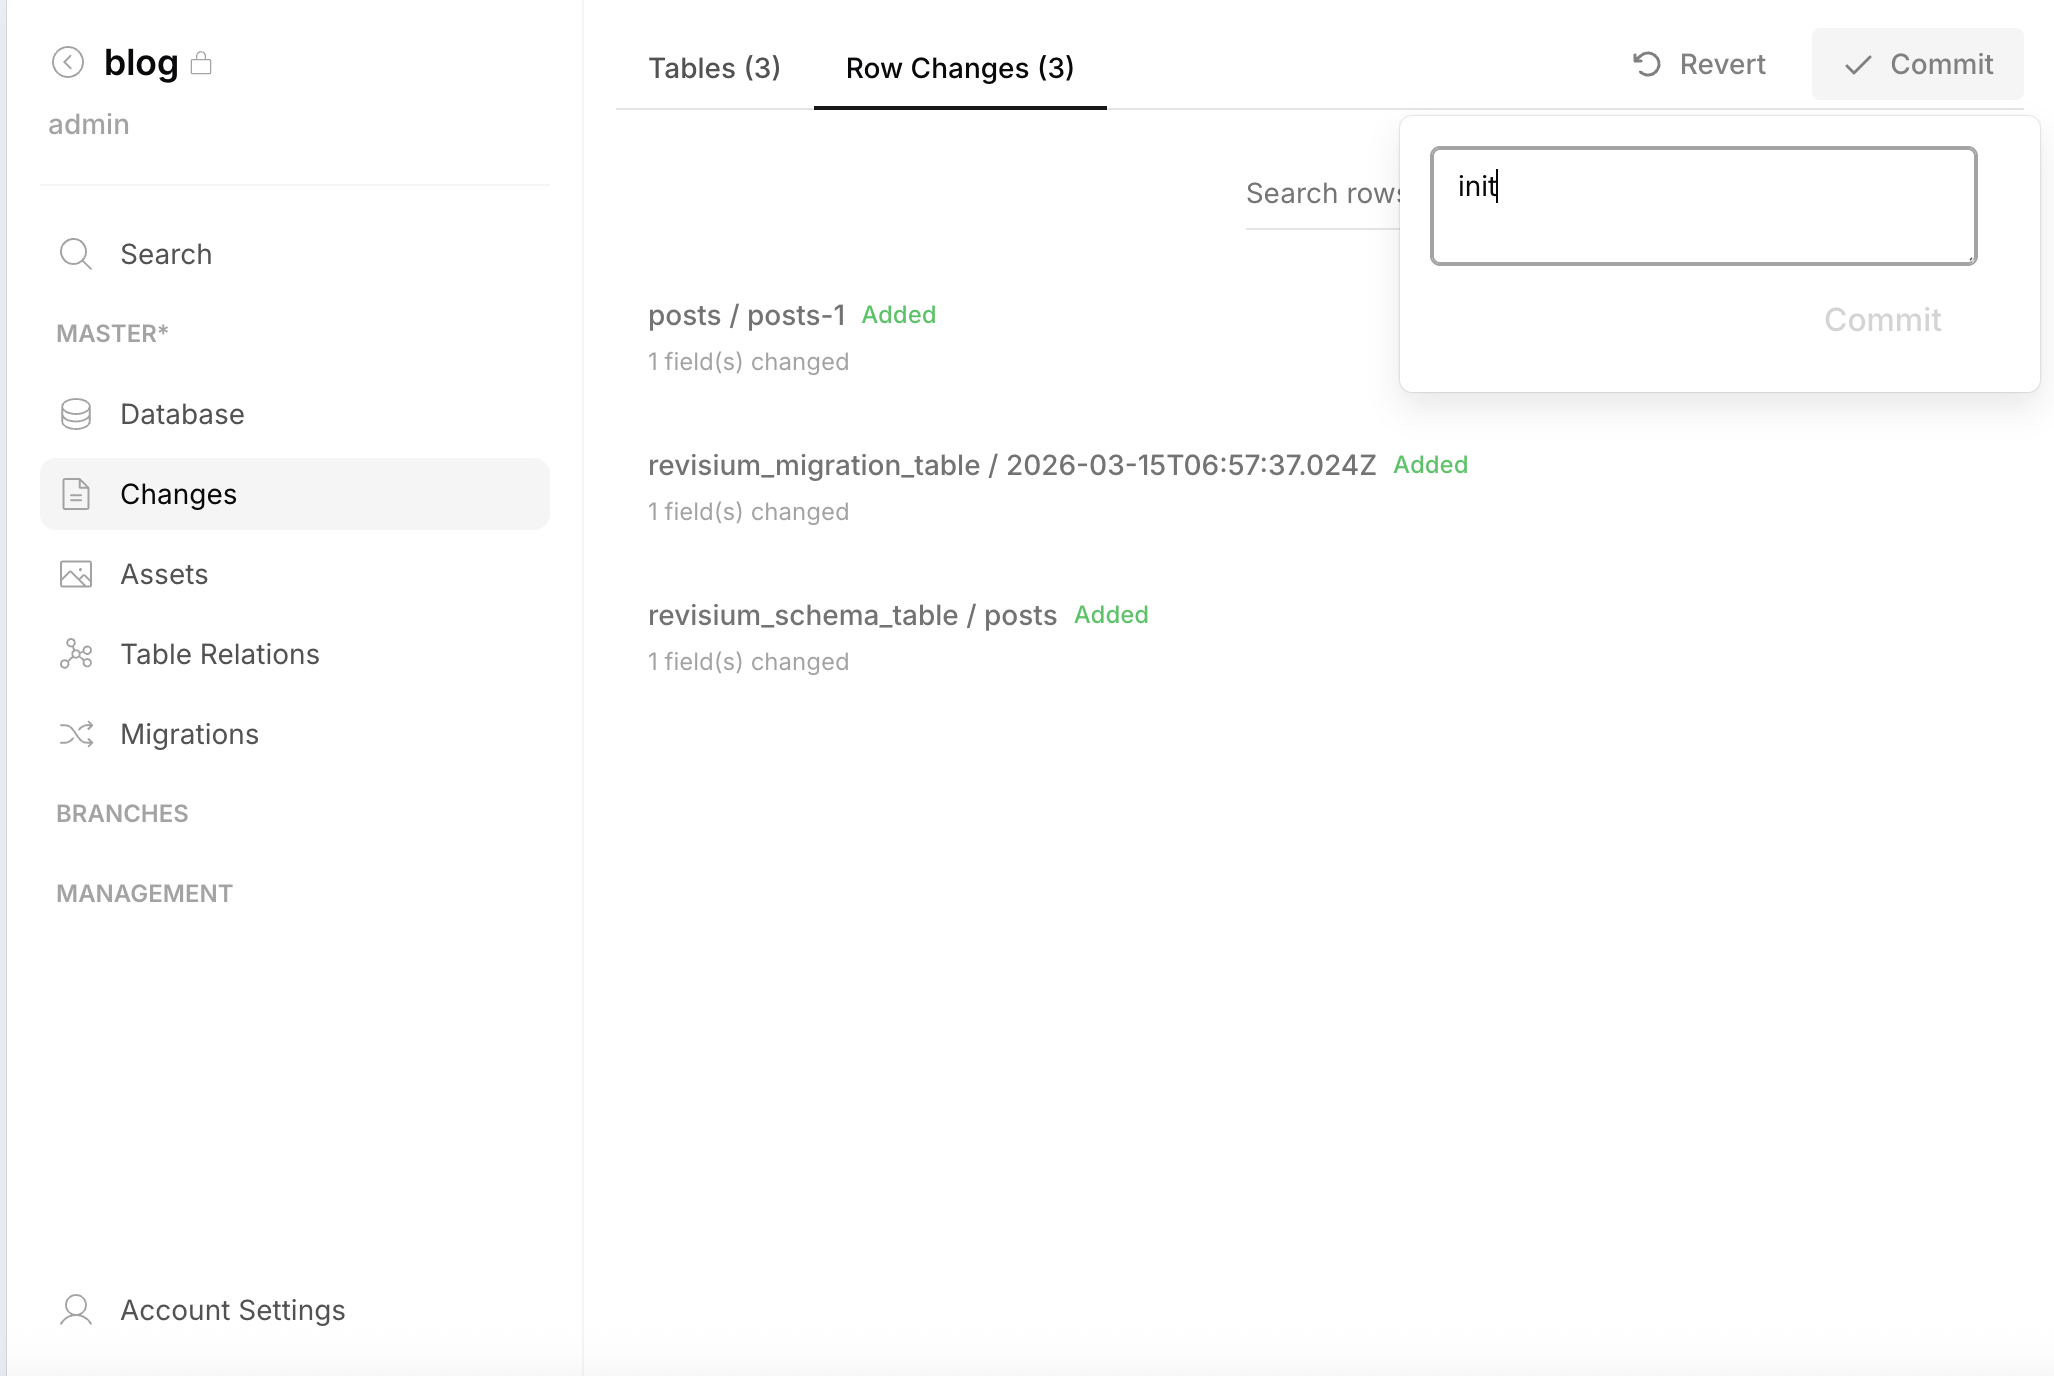
After committing, the draft resets and a new immutable revision becomes HEAD. Endpoint data availability depends on whether the endpoint is bound to HEAD or Draft (see next step).
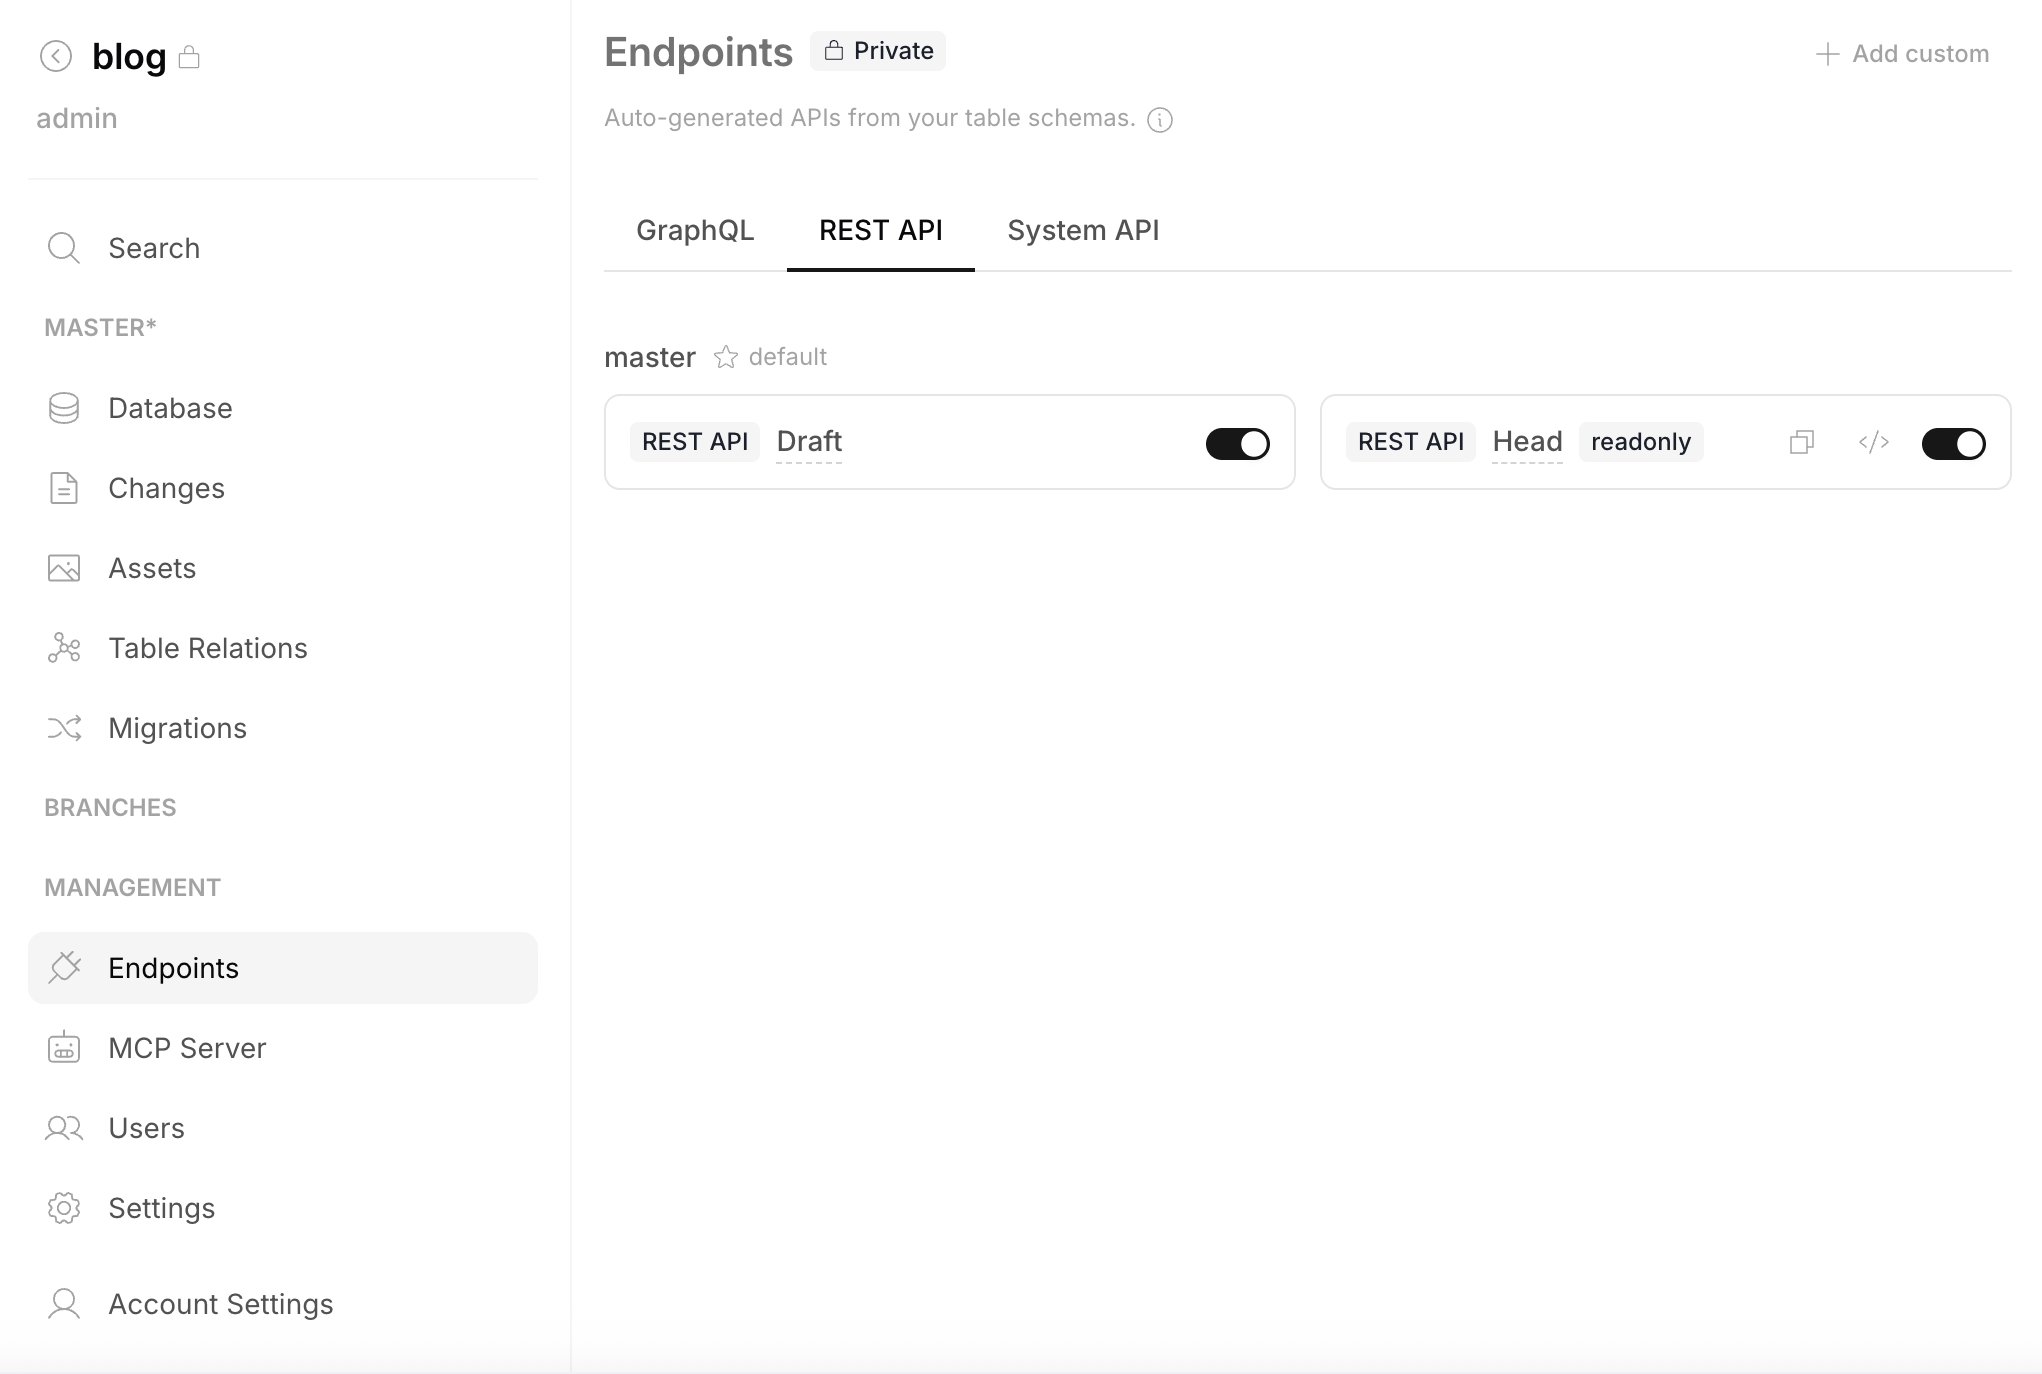
7. Create an API Endpoint
- Expand the Management section in the sidebar and click Endpoints
- Select the REST API tab (or GraphQL)
- Toggle on Draft and/or Head endpoints

Once enabled, hover over an endpoint to copy its URL or open the Swagger UI.
- Head — serves the latest committed revision (read-only, for production)
- Draft — serves the current working state (includes uncommitted changes, for preview)
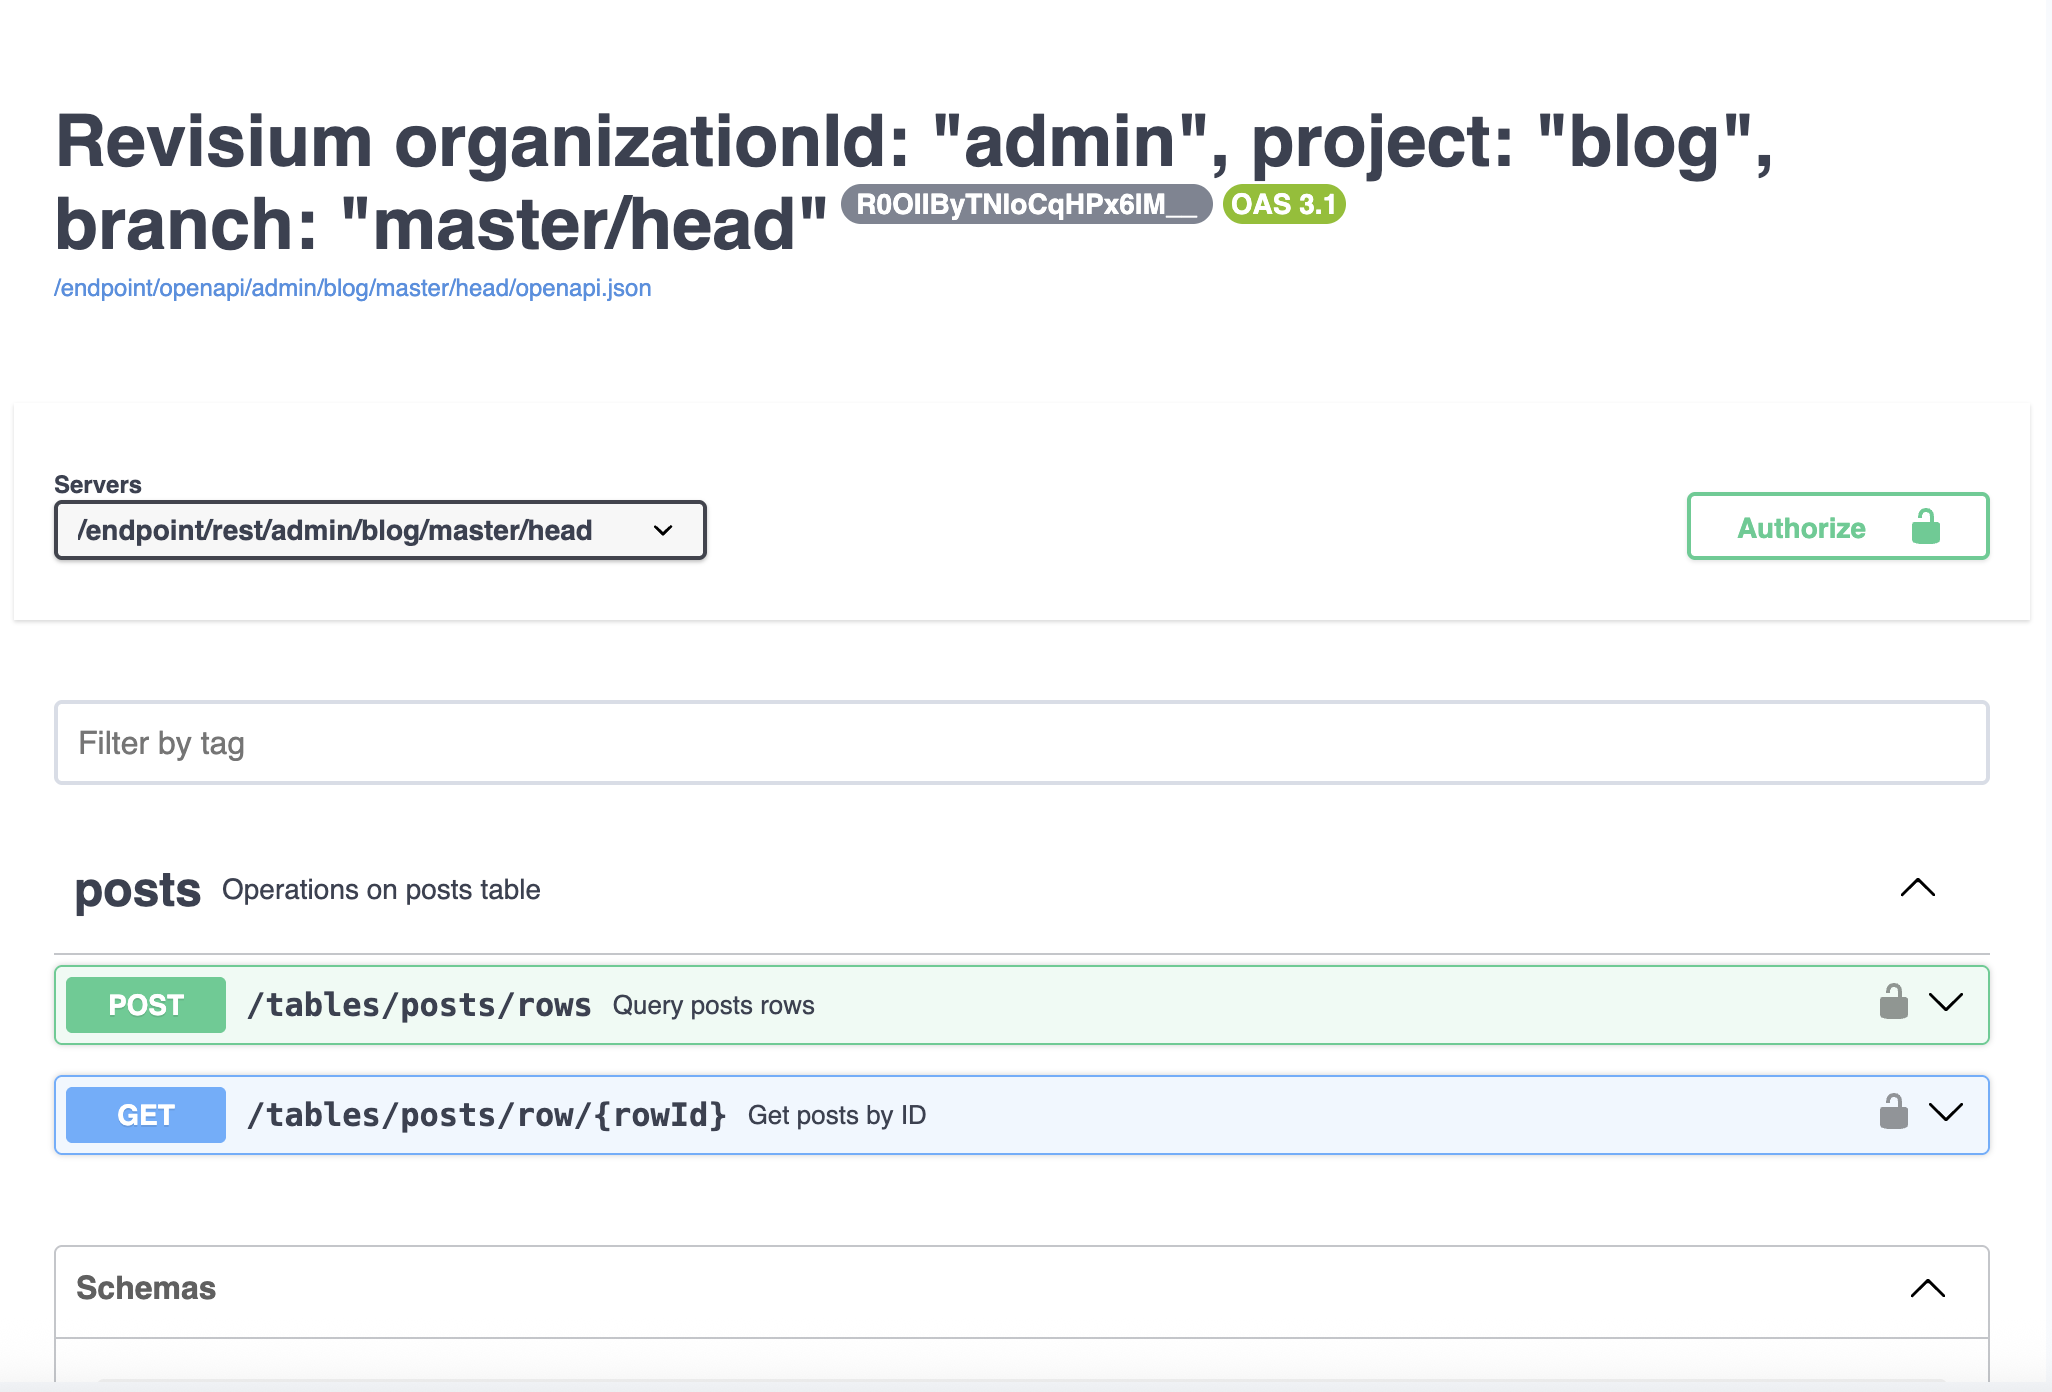
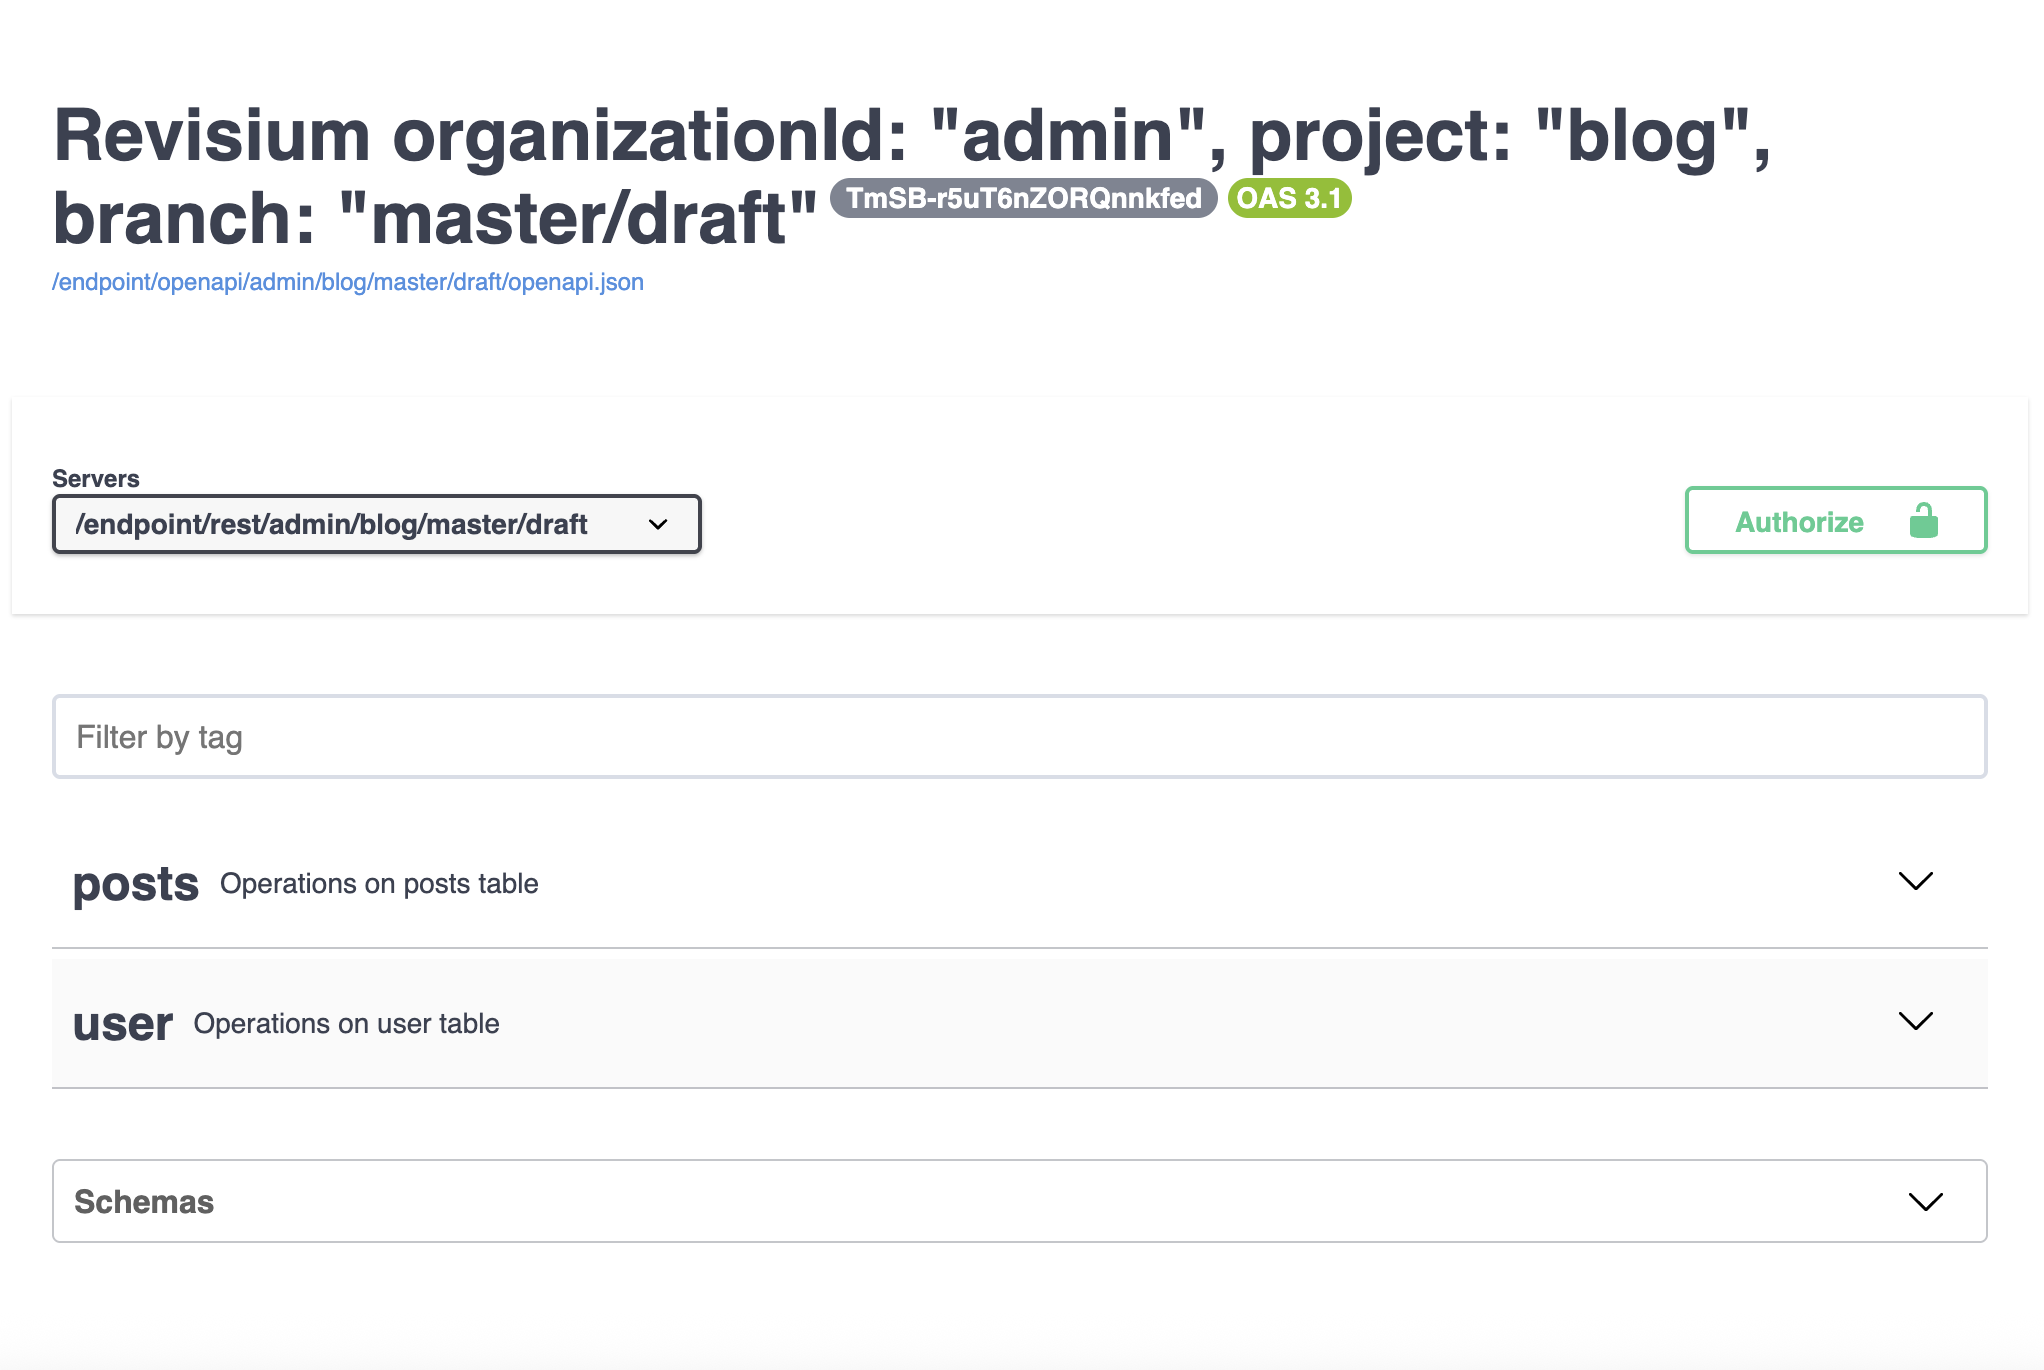
Click the code icon (</>) to open the Swagger UI. Notice how Head shows only committed tables, while Draft includes uncommitted changes (e.g., a new user table added after the last commit):
8. Query Your Data
By default, endpoints require authentication. To make read queries work without a token (convenient for testing), go to Management → Settings and set visibility to Public.

Now query your data with a simple curl (example for Standalone on port 9222):
curl -X GET \
  'http://localhost:9222/endpoint/rest/admin/blog/master/draft/tables/posts/row/hello-world' \
  -H 'accept: application/json'
Or use the Swagger UI — click Try it out, execute, and see the response:
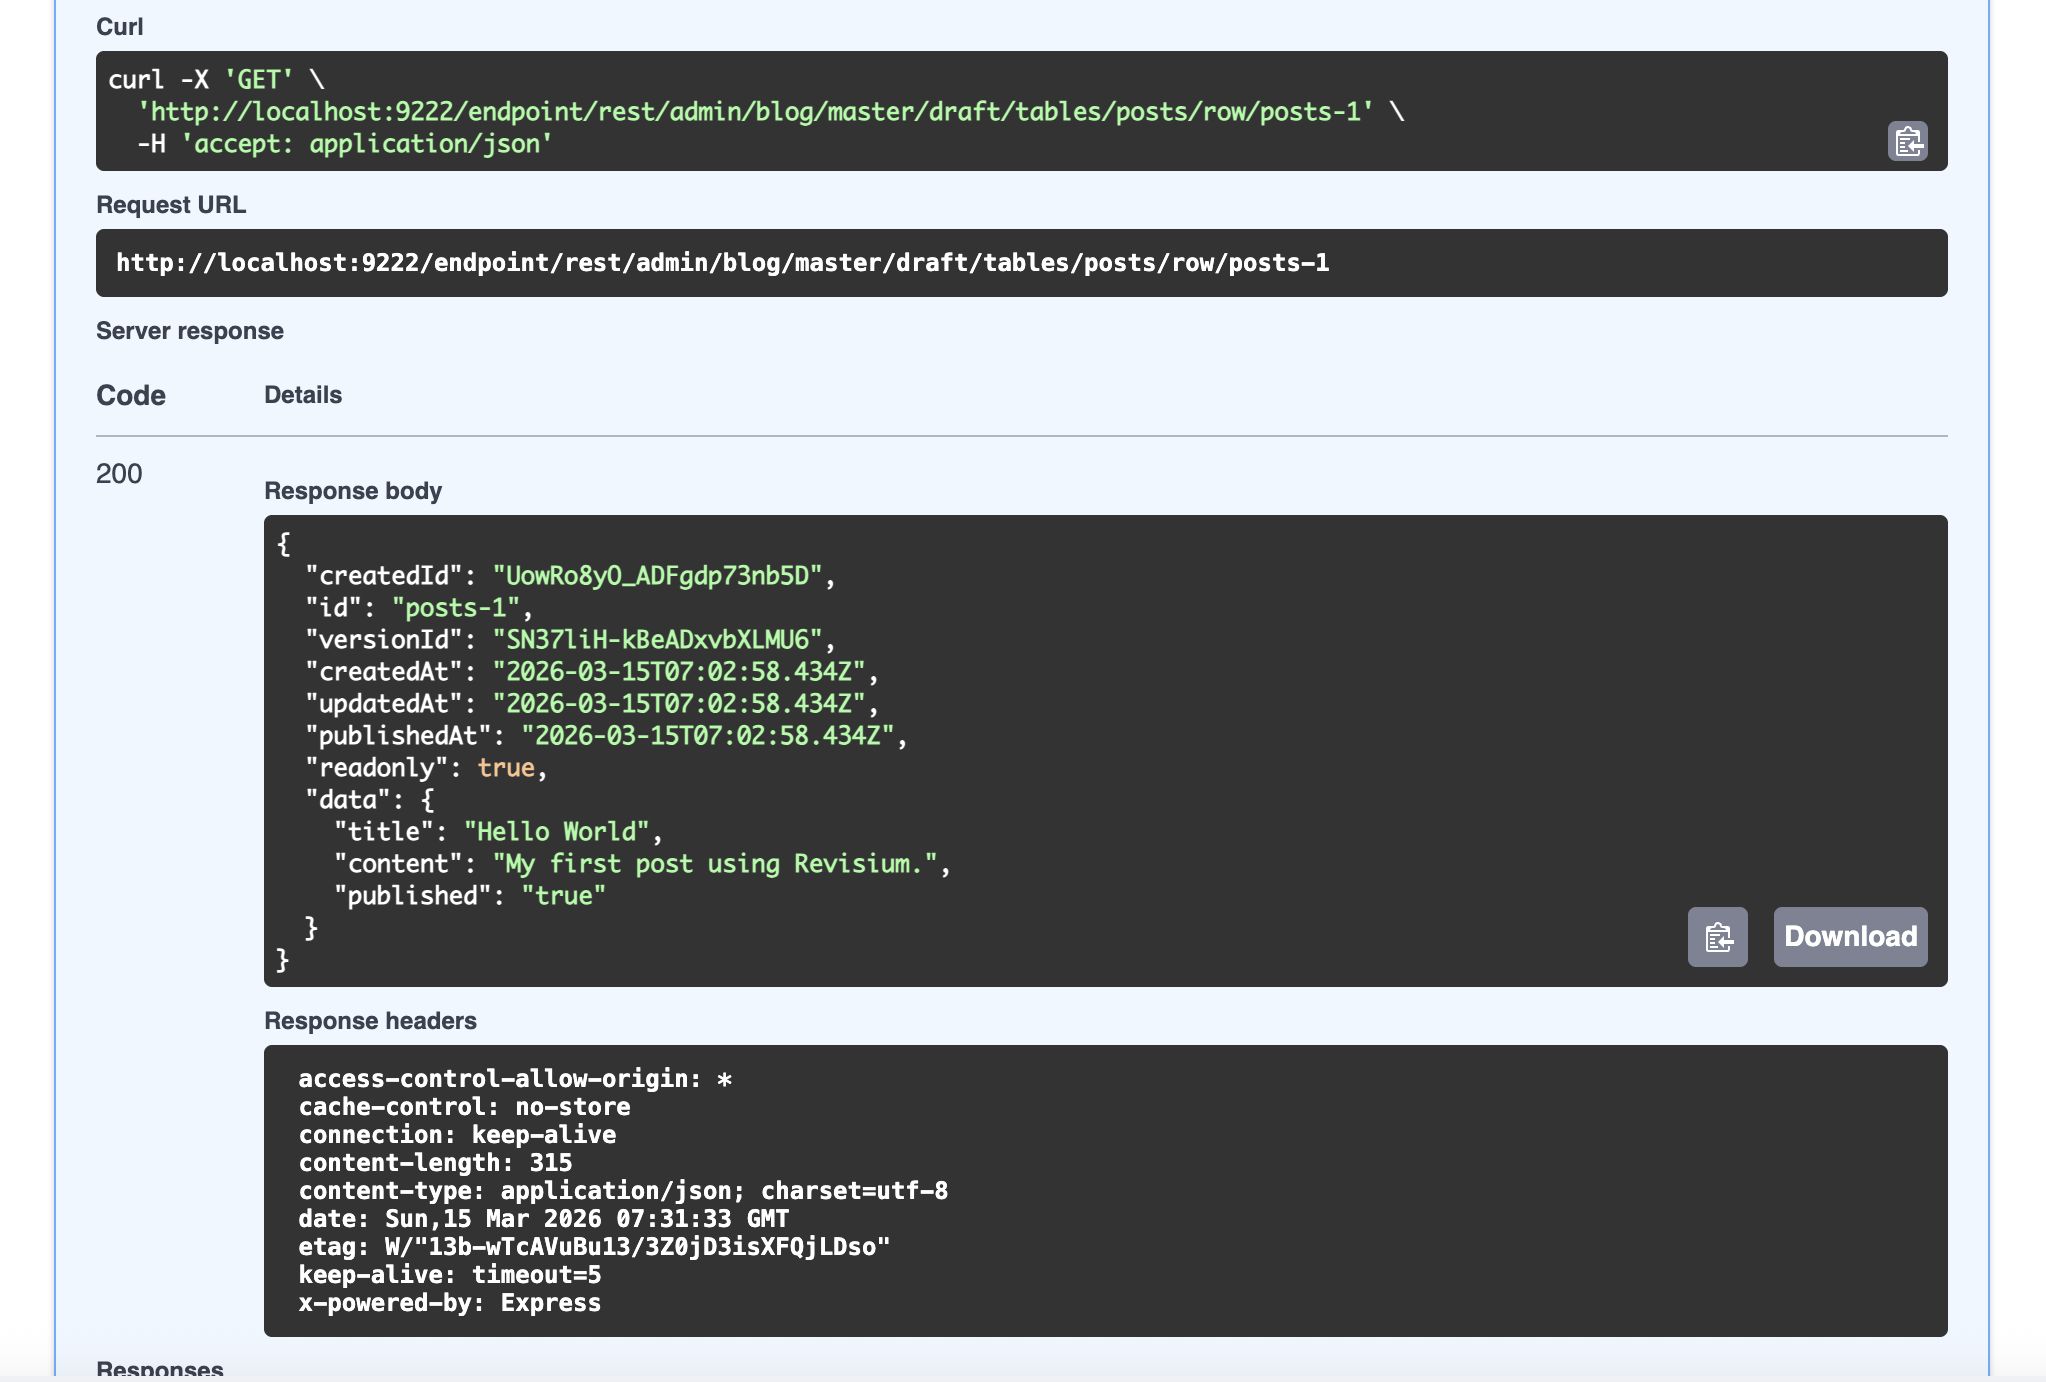
Result
You now have a working Revisium project with:
- A
poststable with typed schema (title, content, published) - Data rows accessible via auto-generated REST and GraphQL APIs
- Version history (if you committed) with rollback capability
- HEAD and Draft endpoints serving different states of your data
Next Steps
- Platform Hierarchy — Organizations, projects, branches, and revisions
- Data Modeling — Field types, nesting, and constraints
- Foreign Keys — Relationships between tables
- Querying Data — Filtering, sorting, pagination
- Deployment — Production setup with Docker or Kubernetes